
Birch Tree Landscape with Pastels

Lessons
About This Lesson Series...
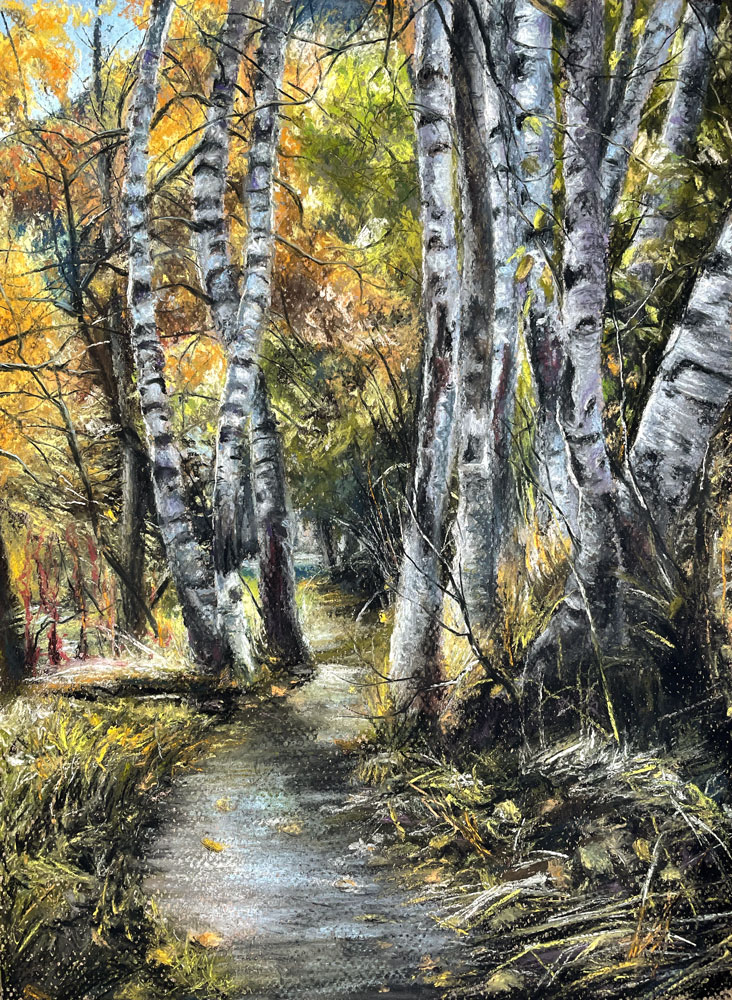
The Birch Tree Landscape with Pastels class is a comprehensive, step-by-step lesson series that teaches artists how to create a realistic and atmospheric pastel landscape featuring birch trees. This class focuses on observation, composition, layering, and blending techniques to capture the unique textures and subtle beauty of birch bark, foliage, and surrounding landscapes. By the end of the lesson, you’ll gain the skills to create a vibrant, dynamic pastel drawing with depth and texture.
Planning the Composition
The lesson begins with planning and sketching the composition. You’ll learn how to break down complex natural scenes into simple shapes, ensuring that the placement of trees and landscape elements is balanced and visually appealing. This early stage emphasizes proportion, perspective, and the relationship between foreground and background, creating a strong foundation for the pastel application.
Blocking in Colors and Shapes
Once the composition is established, the class demonstrates how to block in the main shapes and colors using soft pastels. You’ll explore techniques for creating broad areas of color that represent the forest floor, distant trees, and sky. Working from general to specific, this stage allows you to establish light, value, and overall harmony before adding finer details.
Layering and Blending Techniques
A central focus of the class is layering and blending to create depth and richness. You’ll learn how to build up multiple layers of pastel, combining colors to produce subtle variations in tone and value. Blending techniques are explored to create smooth transitions, soft edges, and atmospheric effects, while preserving texture where necessary. These methods help to bring the birch trees and surrounding landscape to life.
Capturing Texture and Detail
Rendering the texture of birch bark and foliage is a key aspect of the lesson. You’ll learn how to use varied marks, directional strokes, and subtle highlights to depict the distinctive patterns of the trees. The instructor demonstrates how to add delicate details without overworking the pastel, ensuring the drawing maintains its vibrancy and natural feel.
Enhancing Depth and Atmosphere
Depth and atmosphere are crucial in creating a realistic forest scene. The class teaches how to manipulate color, value, and edge quality to push elements into the background and bring others forward. Techniques for softening distant trees and emphasizing contrast in the foreground help create a sense of space, distance, and environmental mood.
Final Refinements and Highlights
In the final stages, attention shifts to refining details, enhancing contrast, and adding highlights to unify the artwork. You’ll learn how to evaluate your pastel drawing as a whole, making adjustments to balance composition, reinforce focal points, and maintain harmony. By the end of the lesson, you’ll have a polished, expressive pastel landscape that captures the beauty of birch trees in a natural setting.
A Complete Pastel Landscape Experience
By completing the Birch Trees with Pastels class, you’ll have developed essential skills in observation, layering, blending, and texture. This lesson provides a strong foundation for creating compelling pastel landscapes and equips you with techniques that can be applied to a wide range of natural subjects. It is perfect for artists of all levels seeking to improve their pastel skills while capturing the serene beauty of the forest.
Specific Lessons
Lesson 1 (1:10:52)
In lesson one, we discuss the materials and begin layering in darker tones and shadows.
Lesson 2 (1:11:04)
In lesson two, we begin refining the trees behind the main birch trees. 中国福彩查询超准开奖记录-五分彩飞艇官网历史记录
Lesson 3 (1:12:08)
In lesson three, we enhance the contrast and push color relationships to create depth on the left side of the picture plane. We also begin laying in tree branches with pastel pencils.
Lesson 4 (1:07:51)
In lesson four, we begin work on the trees on the right side of the picture plane.
中国飞艇1体6彩8网-首页-飞艇168幸运彩现场直播 幸运168飞艇官网今日直播号码 Lesson 5 (1:02:44)
In lesson five, we complete the trees on the right side of the picture and add the overlapping branches and leaves.
Lesson 6 (1:07:53)
168历史记录查询®实时结果体彩 In lesson six, we redirect the path and address the grass and plants around it.
Lesson 7 (1:03:49)
In lesson seven, we complete the pastel painting and with the time remaining - we play a fun creativity boosting drawing game.
168中国幸运飞行艇官方历史开奖结果记录网站 168幸运飞开艇体彩官网开奖结果网站 Resources for this Lesson...
Distributing any content downloaded from this site is strictly prohibited and against the terms and conditions of use.
References
Here's what you'll need...
- Rembrandt Soft Pastels
- CarbOthello Pastel Pencils
- Canson Mi-Teintes Pastel Paper (Steel Gray)
- Kneaded Eraser
- Blending Stumps
(Disclosure: Links to art materials are affiliate links which means we make a small commission if you purchase at no additional cost to you.)

Founder of The Virtual Instructor, artist and teacher. Matt makes learning art easy to understand and enjoyable.
Watching lesson #1 after the fact (on 11 Nov 21), as to not blowing on pastel drawing, for nearly any work that I do, I tape the paper (whatever it is) to Gatorboard. It is light and very easy to pick up and tap gently on the edge of trash can so the powder falls into can. Gatorboard comes in many sizes and can be gotten from Blicks or Cheap joes or probably Amazon. I have several sizes for any size paper. They last for years. I have even stapled watercolor paper to it and then reused the Gatorboard afterward. It is wonderful stuff and I won’t work without it. I get no money for saying so either. 🙂
Is there homework? Seems like you mentioned we should do some of the colors for the right side?
JUST WONDERING, WHY DON’T YOU USA AN EASEL?
Hello Matt: would you talk about how you are able to make fine lines with oil pastel. I don’t see you sharpening the sticks and I am working with all rounded edges .I have no control over the marks I’m putting down.
I am part way thru the oil pastel course and loving it. Especiall enjoyed the color scheme examples set against the paintings.
Thanks tom
thank you, Matt, for answering my question at about 10 min: into lesson 7.
i am amazed at this painting as well as the past oil pastel works that have been on “Live Lessons.”
I keep looking down that path to see what is there.
Looking forward to the Photoshop lessons, I have an old Elements package so I’m sure I’ll be able to follow along.
Happy Holiday to all the folks in this community tom
Matt, I’ve seen you work through many, many courses and enjoyed all of them without exception. Maybe it is just that my natural love is for soft pastel but this lesson from start to finish feels like I have watched a real master of this media. This particular painting is absolutely a favorite and thank you so much for letting us see this process!
Loved following this one, not been able to follow live, learnt a lot. Loved the festive game at the end too, thank you
Would this course be suitable if I use oil pastels?
I use a tiny hand-held vacuum to collect pastel dust as my painting progresses. It works well.
Hi Matt, I am a new member and I love your teaching methods ; very detailed and easy to follow. I learned a lot through this live lesson and thank you! I was really excited to see the reference photo as I really wanted to learn how to express the happy sunshine playful on the leaves, the trees , the ground …I liked your final image in a different way with different feelings: you created the forest on a rather cloudy day , a little bit sad, calm and peaceful …and it’s also a beauty! Would you teach us how to achieve the sun rays through sceneries? Thank you!
Hi Yen,
Thanks so much for your comments. Here’s a lesson series that includes sun rays…https://thevirtualinstructor.com/members/graphite-elephant-live-lesson-series/ It’s a different approach though since this drawing was completed with graphite.
Thank you so much Matt !
Paint.Net is another program that has the same features that Photo shop has and you can add brushes and other things to it. It is free.
Paint net.com has the same features and you can add brushes and other features to it.
I completed the birchtree forest and then did the Christmas sketch in May! Good times, as always, learned a lot, had some laughs and I’m off to find the Photoshop lesson next.