
Drawing Bootcamp 2.0

Lessons
About This Lesson Series...
Learn how to see as an artist. In this series of lessons, Matt guides you through the fundamentals of drawing with an emphasis on learning to see. Each lesson in the series focuses on a different concept or element of art, gradually easing you into a full understanding of how to see. Each week a new concept is introduced and reinforced through a drawing exercise or two.
Lesson One - Line
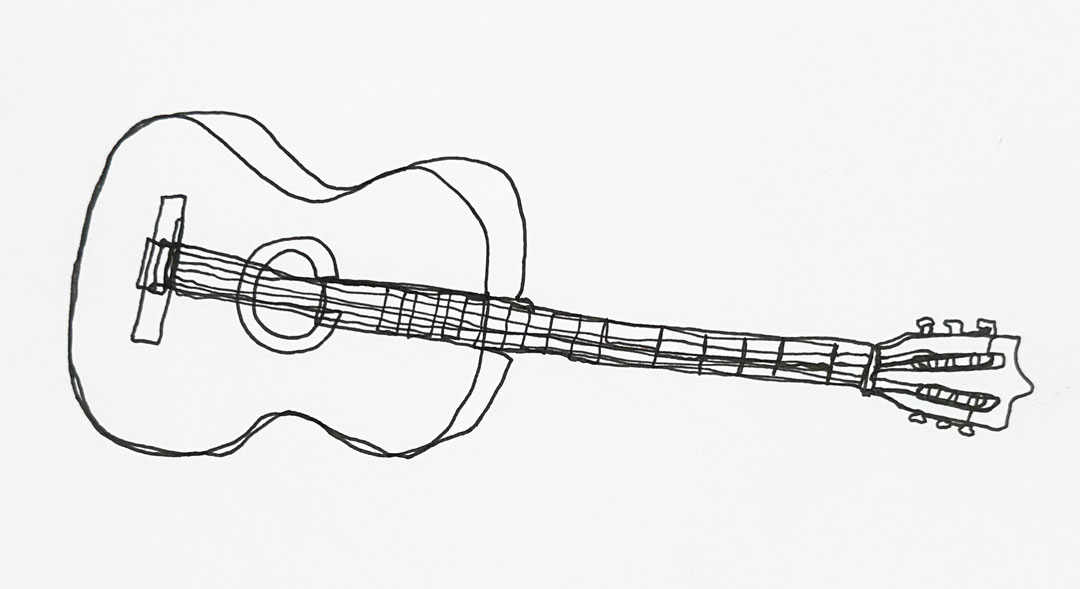
The first lesson in this series is focused on removing misconceptions about drawing while revealing truths that are essential for success. The first element of art, line, is introduced and discussed. Several drawing exercises ease the student into fully understanding line's importance in drawing and how line can be used to suggest form and value without any shading.
The Foundation of Every Drawing
Line is one of the most fundamental elements of drawing. Before value, texture, or color are added, line is what allows artists to describe shapes, define edges, and organize space on the surface. Even the most complex drawings begin with simple marks that establish structure and placement. Without strong linework, forms can appear flat, uncertain, or poorly constructed. Mastering line gives artists control and clarity from the very first stages of a drawing.
Line as a Tool for Communication
Lines do more than outline objects — they communicate information. Thick, bold lines can suggest strength or importance, while thin, delicate lines can feel light or distant. Curved lines may create a sense of movement and grace, while straight lines often feel stable or rigid. By varying line weight, length, and direction, artists can guide the viewer’s eye and create emphasis within a composition.
Building Form and Depth
Line also plays a critical role in showing three-dimensional form. Contour lines describe edges, while cross-contour lines move across surfaces to reveal volume. Thoughtful line placement helps define light, shadow boundaries, and spatial relationships. Developing sensitivity to line leads to drawings that feel more solid, confident, and expressive.
Lesson Two - Shape
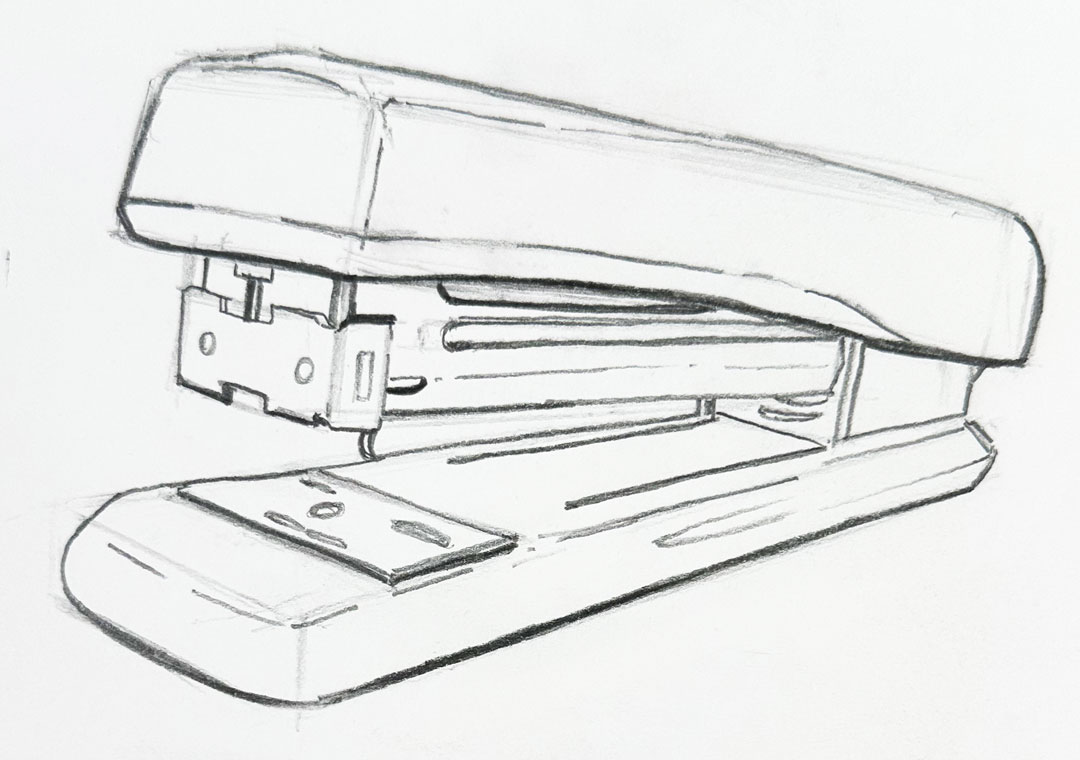
The second lesson in this series is focused on shape. Shape is an enclosed line. Shapes are either geometric or organic. By learning how to identify and draw simple shapes within complex shapes, we can draw anything. This lesson is focused on teaching you how to identify shapes and piece them together to create the complex shapes of the world around us.
Seeing the World as Shapes
Shape is one of the core building blocks of drawing. Everything we see can be simplified into basic shapes like circles, squares, triangles, and organic forms. Learning to recognize and draw these shapes accurately allows artists to establish structure and proportion early in the process. Before details are added, strong shapes create a solid foundation that keeps a drawing believable and balanced.
From Flat Shapes to Solid Form
Although shapes are two-dimensional, they are the stepping stones to creating three-dimensional form. By refining shapes and adjusting their edges, artists can transition into value, texture, and depth. Understanding shape allows artists to simplify complex subjects, make corrections more easily, and build drawings that feel strong from the very beginning.
Lesson Three - Positive and Negative Shapes (Spaces)
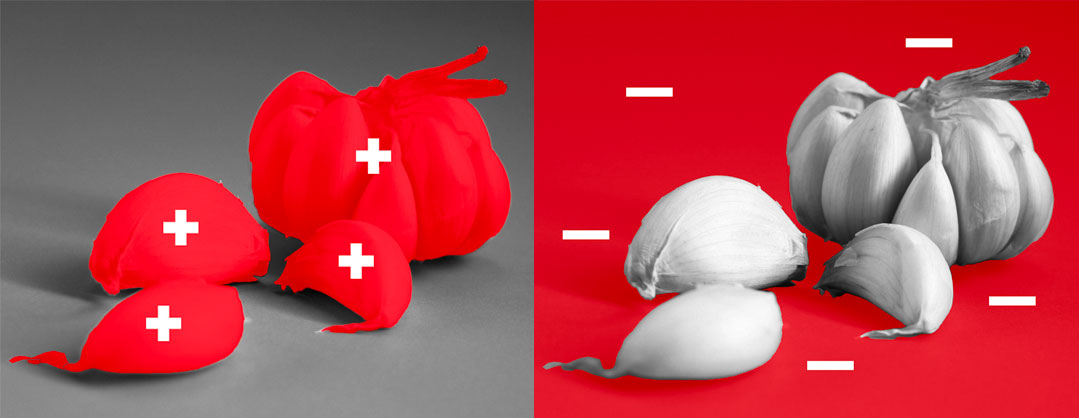
The third lesson in this series is focused on positive and negative shapes (also called spaces). Positive shapes make up the main subjects within the composition, while negative shapes are the shapes around the main subjects. Not only can we use positive shapes to accurately depict subjects in a drawing, but we can also compare the negative shapes to ensure accuracy.
Using Positive and Negative Shapes Together
Focusing on negative shapes helps eliminate assumptions. Instead of thinking, “This is an arm” or “This is a chair,” you begin to see abstract shapes created by the spaces around those forms. These shapes are often simpler and easier to compare than the subject itself. When the negative shapes are accurate, the positive shapes naturally fall into place.
This approach also improves proportion and alignment. By comparing the angles, widths, and contours of surrounding spaces, you create checkpoints throughout the drawing process. If a negative shape looks incorrect, it immediately signals that something in the positive shape needs adjustment.
Using positive and negative shapes together shifts your mindset from drawing objects to drawing relationships. And when you draw relationships accurately, your overall drawing becomes more precise, balanced, and believable.
Lessons Four and Five - Value
The fourth lesson in this series is focused on value. Value is the darkness or lightness of color and is the most important element of art. We understand the world around us because of value and capturing the correct values found on our subjects is critically important. In this lesson, we explore this element and learn to see values as shapes.
How Value is Used
In drawing, value is used to describe how light interacts with objects. When light hits a form, it creates highlights, midtones, core shadows, reflected light, and cast shadows. Accurately observing and rendering these value relationships allows an artist to transform basic shapes into realistic forms. For example, a circle becomes a sphere when gradual transitions from light to dark are applied correctly.
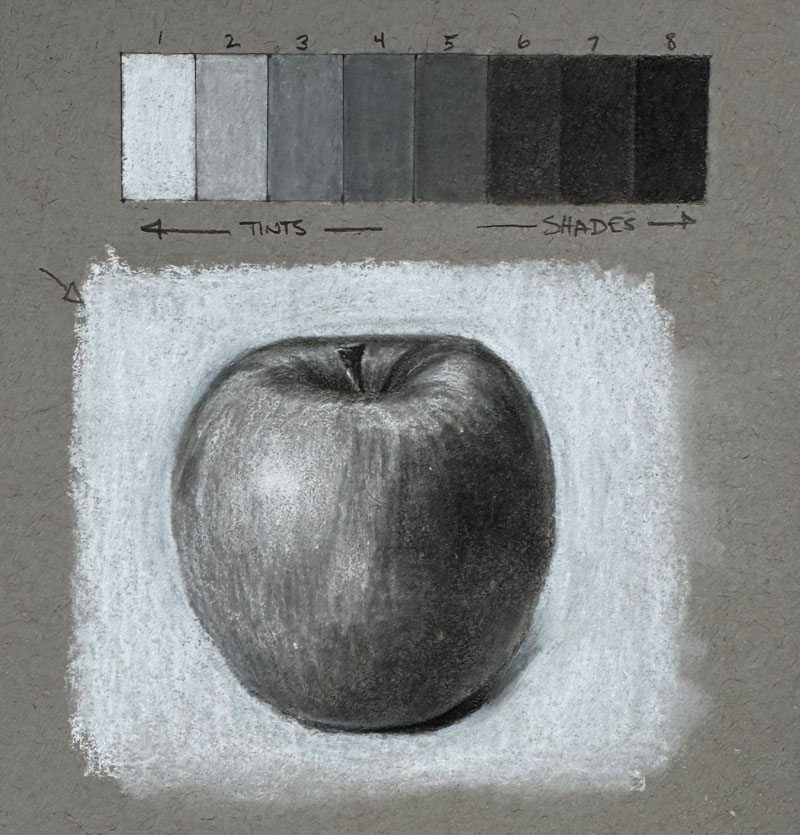
Value is also essential for creating contrast and focal points. Areas of strong contrast naturally draw the viewer’s eye, helping guide attention within a composition. Additionally, controlling value allows artists to establish mood and atmosphere. High-contrast drawings can feel dramatic and bold, while subtle value shifts create softness and calm.
Developing skill with value improves every type of drawing—whether working in graphite, charcoal, ink, colored pencil, or paint. Mastering value gives artists the foundation needed to create convincing, expressive artwork.
Lessons Six through Nine - Texture
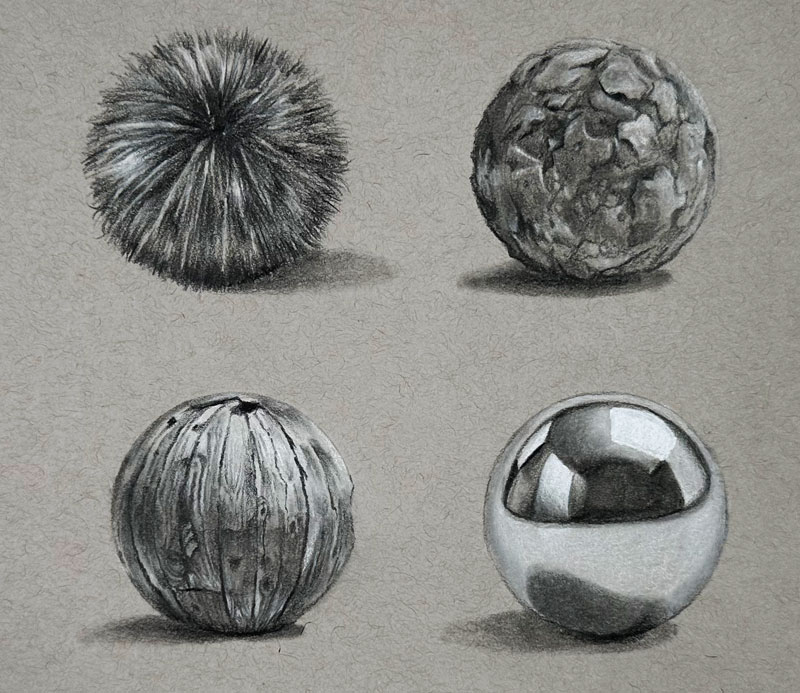
Texture plays a vital role in creating convincing drawings. It helps communicate the surface quality of objects and adds visual interest, depth, and realism. Whether you're drawing rough bark, soft fur, or smooth glass, successfully depicting texture relies on understanding a few essential concepts. Three of the most important are the surface texture of the paper, the directional strokes made with the drawing medium, and the relationships and shapes of value within the subject.
The Surface Texture of the Paper
The paper you choose has a significant impact on how texture appears in a drawing. Most drawing papers have a slight surface texture known as “tooth.” This tooth grabs pigment from the medium and affects how marks are created and layered. A rougher paper will naturally create more broken, textured marks, which can be useful for subjects like stone, wood, or foliage. Smoother papers allow for softer transitions and finer details. Understanding how the paper interacts with your medium helps you use the surface itself as part of the texture-building process.
Directional Strokes
Texture is often suggested through the direction and character of the marks you make. Directional stroking means applying marks that follow the natural form or growth pattern of the subject. For example, strokes used to draw fur may follow the direction of the hair, while marks used for wood grain may flow along the length of the board. By aligning strokes with the structure of the subject, the drawing becomes more believable and visually dynamic.
Value Relationships and Shapes
Perhaps the most important element in creating convincing texture is the careful observation of values. Light and dark shapes define the bumps, ridges, and indentations found on a surface. Instead of drawing every tiny detail, focus on the larger shapes of value that describe the texture. When the relationships between lights, midtones, and darks are accurate, the illusion of texture naturally emerges.
By combining the tooth of the paper, thoughtful directional marks, and strong value relationships, artists can create convincing textures that bring drawings to life.
Lessons Ten through Fourteen - Still Life Drawing
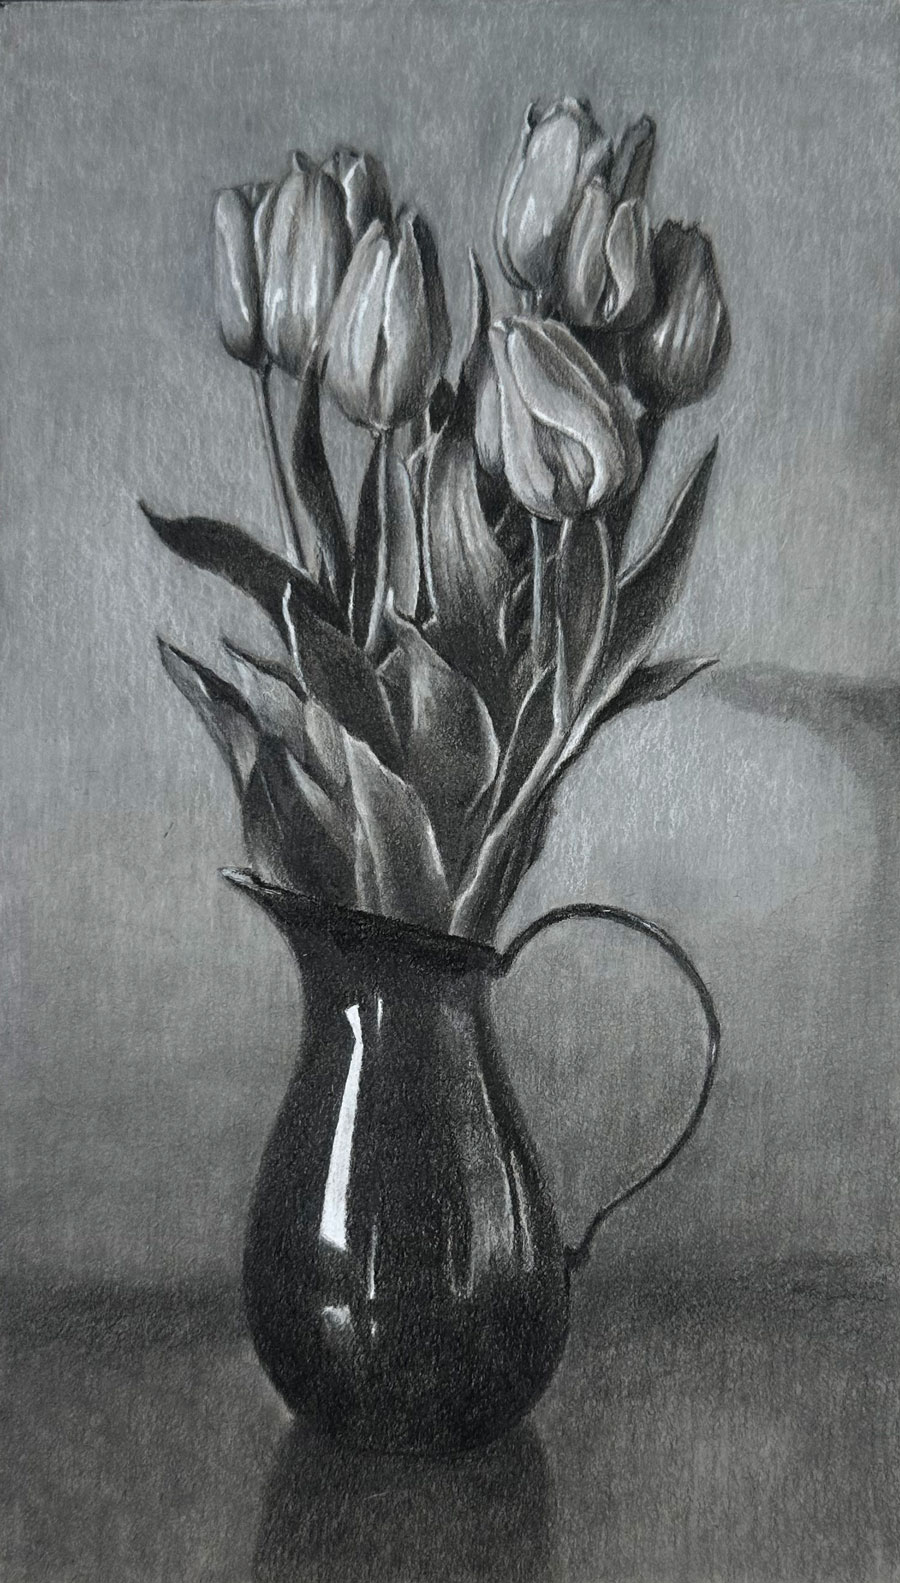
The last exercise of the lesson series focuses on combining all of the concepts discussed. In these last several lessons, students create a complete drawing of a challenging still life arrangement using graphite and white charcoal on gray drawing paper.
Specific Lessons
Lesson 1 (1:08:44)
In lesson one, we discuss the essence of drawing and create several line drawings of everyday objects.
Lesson 2 (1:07:55)
In lesson two, we discuss shape and how to break down complex objects into simple shapes.
Lesson 3 (1:13:04)
In lesson three, we discuss how to use positive and negative shapes together to ensure accuracy in a drawing.
Lesson 4 (1:13:53)
In lesson four, we discuss the element of art, value, and its importance in drawing.
Lesson 5 (1:08:45)
In lesson five, we put what we've learned about value into practice and draw an apple with the aid of a value scale.
Lesson 6 (1:08:28)
In lesson six, we introduce texture and the three main factors its illusion in a drawing.
Lesson 7 (1:12:16)
In lesson seven, we continue our study of drawing texture by drawing a rocky sphere.
Lesson 8 (1:10:29)
In lesson eight, we continue our study of drawing texture by drawing a wooden sphere.
Lesson 9 (1:19:54)
In lesson nine, we continue our study of drawing texture by drawing a highly reflective metal sphere.
Lesson 10 (1:20:42)
In lesson ten, we begin drawing the contours of the final subject, a challenging still life of tulip flowers.
Lesson 11 (1:05:34)
In lesson eleven, we begin developing the value and shading on the tulip flowers.
Lesson 12 (1:08:47)
In lesson twelve, we finish the tulips and move on to the leaves and stems of the plants.
Lesson 13 (1:13:54)
In lesson thirteen, we finish the leaves and address portions of the background.
Lesson 14 (1:28:27)
In lesson fourteen, we complete the final drawing exercise.
Resources for this Lesson...
Distributing any content downloaded from this site is strictly prohibited and against the terms and conditions of use.
References
LESSON ONE - LINE
LESSON TWO - SHAPE
Spay Bottle with Shapes Reference
LESSON THREE - POSITIVE AND NEGATIVE SHAPES
LESSONS FOUR and FIVE - VALUE
LESSONS SIX through NINE - TEXTURE
Black and White Spheres Reference
FINAL EXERCISE
Here's what you'll need...
- Graphite Drawing Pencils
- Technical Drawing Pens
- White Drawing Paper
- Gray Drawing Paper
- White Charcoal Pencils
(Disclosure: Links to art materials are affiliate links which means we make a small commission if you purchase at no additional cost to you.)

Founder of The Virtual Instructor, artist and teacher. Matt makes learning art easy to understand and enjoyable.
Hello Teacher Matt,
I am wondering how many times can I arrive late before I am given extra homework or sent to
dentition? I am really enjoying this review. I never get tired of reviewing the basic and am enjoying Monday’s with Matt. Thank you for going the extra mile for us.
I’ll try to be on time next week and not fall asleep before class!!
Teri (Artsycrochet)
Love this new set of lessons Matt. My favourite lessons so far have been the Boot Camp and the drawing Exercises.
Are you going to repeat yourself a lot or have you designed some new exercises?
Thanks Lesley,
I’m not sure what you mean by “repeat yourself a lot”. This series is quite different from the first. Concepts (like line, shape, value, etc.) that are discussed are universal for drawing and painting, but the exercises and the way the information is presented is quite different. The exercises in this version of Drawing Bootcamp are extremely different from the first series, which was published over ten years ago. We are also going much more in depth with the concepts and covering material that wasn’t in the first version of Drawing Bootcamp. Have you watched all of the lessons in this series thus far?
I have only just found this as I have been busy catching up on other projects. I am enjoying the lessons very much. I cannot join you live as our time difference here means “Gettin’ Sketchy” starts at 11.30pm so your live lessons at normally straight after at 12.30am!
Be assured that I am an avid watcher of Gettin’ Sketchy and draw along with the recording every week that they are shown. THANK YOU VERY MUCH
Dear Matt,
Mondays with Matt is a wonderful lesson series that provides and summarizes all the basics you need to get seriously started with drawing (and painting). Although it’s created for beginners, in each lesson there is something to learn for just everybody. Todays 4th lesson – the apple – is so very important and I have learned that even after several years of drawing, value is still an issue (for me).
As I am planning to get a puppy this summer, which might lead to little time for drawing, this season will be great for 1.001 smaller drawings in my sketch book. I am so happy being part of this family.
Buddy
Drawing along with this course where you are looking at textures. I love working on the STIPPLE paper
Hello Matt,
I was wondering when you will have time to post Monday the 23 episode 8 of the current course? I am sorry that I missed the last class, my internet went down and was out the whole day from around 11am till midnight I star my own but would rather follow your teaching so I am sure to do it correctly when drawing wood.
. See you on Wednesday, Thank you and Greetings to you and your family.
Artsy
Hello Matt,
Thank you for posting this so quickly. I really appreciate it and all the times you go out of your way to help us learn and improve our artist journey.
Artsy
Thank you Matt for coming back on Mondays and inspiring us with these new classes on the basics of art!
We all appreciate the extra time and effort you put in for all of us! I am enjoying the classes very much and it is giving me a better understanding of the different values needed to allow the art to come alive!
I’ll have to catch up with the April 6th class cuz was taking down the flowers off our cross at Church to save them in vases. We have a tradition of a 5ft white cross with chicken wire that members from the parish bring flowers from home and town, to put on it until it is filled with colors and life of all the Spring flowers for Easter!
Glad you decided to give us another live class where we can ask questions and discuss things with each other. It is a privilege to have begun to learn so much about all the different mediums and kinds of art we can actually learn how to use!
Enjoying the new series and the journey. I am currently on lesson 7, but have been completing about 2 lessons at a time. I have completed the 25 days to better drawing and am really having fun with this course as well. I hope to be brave enough soon to take on a bigger challenge, but for now am sticking to the beginner lessons. Do you recommend Secrets to Drawing next?
Hi Anglea, The Secrets to Drawing will be good for you if you feel you still need some time with the basics. If you feel as though you have a fairly solid understanding of them, you could move on to a specific medium you want to learn – perhaps The Guide to Graphite, The Colored Pencil Course, or The Pen and Ink Experience may be a good next step.
Hi Matt, I am not seeing the reference photo for lesson ten . I thought I heard it would be on here . Thank you Jan
Hi Jan, Lesson 10 has not been presented yet and we haven’t begun the final drawing. So the reference for the final image is still on the Live stream page here…https://thevirtualinstructor.com/members/mondays-with-matt-live-stream It will be added to this page, under the resources tab, once we begin on the final drawing in the next lesson.
Hi Matt,
Next school year, I am giving an intro to drawing class for 4th-6th graders at a homeschooling co-op, 15 sessions/semester. I’ve considered using Drawing on the Right Side of the Brain workbook and portions of Mona Brooke’s Drawing with Children as my basis. Then I saw this new series today! Do you have exceptions to your copyright use, possibly purchasing a license for use, or another way for people to implement portions this series in teaching a larger group? I also feel Secrets to Drawing would also be very helpful for this age group, as they are looking to produce realistic drawings. Looking forward to hearing from you and thanks again for such a wonderful site!
Matt, how soon before you post this week’s Monday’s with Matt. I’m looking forward to doing the homework. Thanks!
rheba
Hi Rheba, I just posted it. 🙂
Hi Matt,
Loving these lessons. I am using Canson XL – sand grain paper, dry mixed media paper. I am guessing it’s because of the sand grain that I am not really experiencing problems with going light over dark. I am using Mars lumograph black and Derwent White charcoal. I have used this paper for all the leesons so far, and I am about to start the boss-level drawing of the flowers. I was wondering I if should change paper (strathmore has to specially imported to my part of the world), or can I continue with the sand grain paper. I sort of feel like I’m cheating using this paper.
Sys