
Pen and Ink Architecture

Lessons
About This Lesson Series...
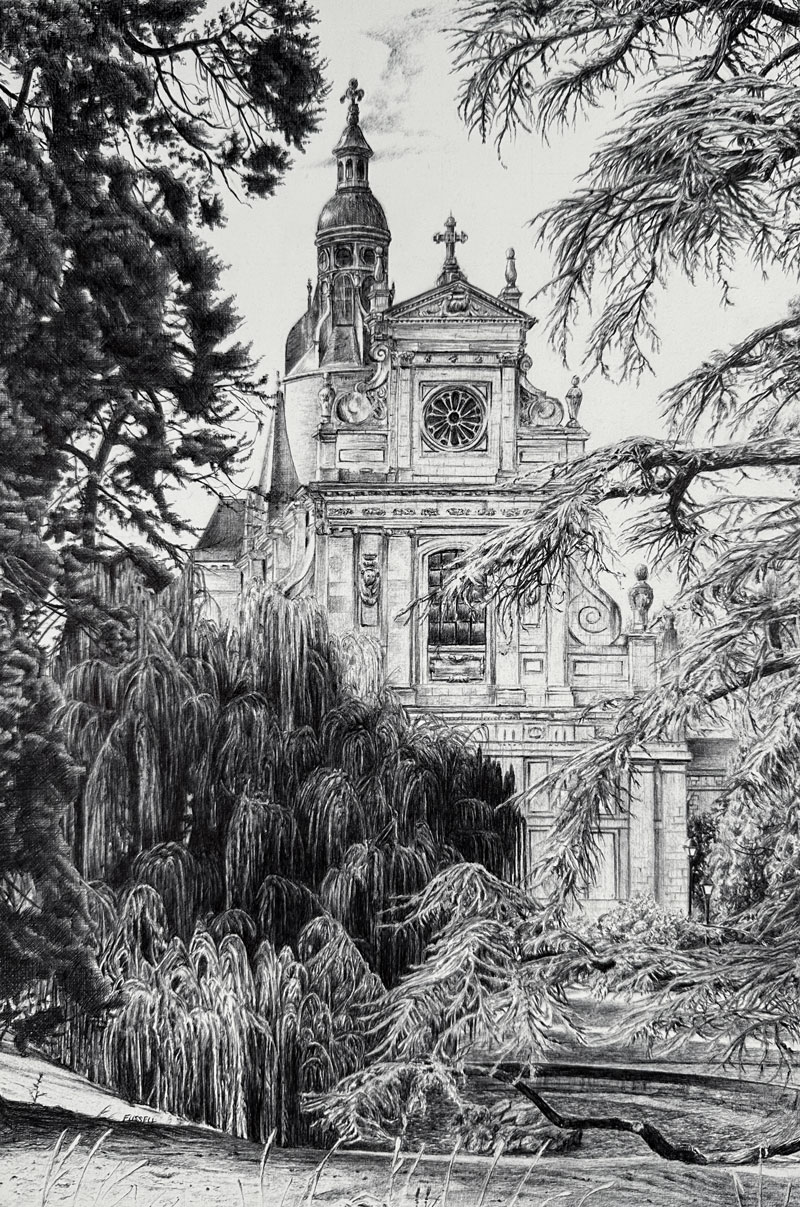
This class series, taught by Matt, guides students through the complete process of creating a pen and ink drawing inspired by classic architectural subjects. The goal of the series is to produce a finished artwork that resembles a traditional etching with rich tonal washes. Through a structured, step-by-step approach, students learn how to balance control and expression while working with permanent ink media.
Materials and Preparation
The series begins with a detailed discussion of materials and why each one is chosen. Students are introduced to oil-based ballpoint pens, and hot press watercolor paper. Matt explains how each tool contributes to the etched aesthetic with the crisp, deliberate lines of the pens. Understanding these materials early ensures confidence and consistency throughout the lessons.
Practicing Techniques with a Preliminary Sketch
Before moving to the final artwork, students practice with the materials through a small sketch. This exercise allows exploration of line weight, hatching, cross-hatching, and wash application without pressure. Students learn how to control ink flow, vary mark-making, and create tonal values that suggest form and depth. This practice stage establishes familiarity with the tools and helps refine technique.
Planning the Final Drawing
With the materials understood, the series transitions to the final surface. Students begin by lightly sketching the architectural subject in pencil, focusing on proportion, perspective, and structural accuracy. Emphasis is placed on clean, confident contours that will guide the ink work. This careful planning stage ensures the complex architectural elements are correctly placed and visually balanced.
Applying Pen and Ink
Once the pencil sketch is complete, students move into pen applications. Using ballpoint pens, lines are layered to define edges, textures, and shadows. Techniques inspired by traditional etching are demonstrated, including controlled hatching and directional line work. Students learn how to build value gradually while preserving clarity and structure.
Specific Lessons
Lesson 1 (1:08:44)
In lesson one, we discuss the materials and begin a small sketch study of the subject while exploring material combinations.
Lesson 2 (1:07:55)
In lesson two, we discuss the completed sketch and begin drawing the contour lines using a grid on the final 9" by 13.5" paper.
Lesson 3 (1:14:18)
In lesson three, we begin with pen and ink applications on the trees on the left of the picture plane. Strategies for developing the texture of the tree is discussed and demonstrated using simple hatching and cross hatching.
Lesson 4 (1:15:11)
In lesson four, we begin with pen and ink applications on the building, starting with the tower at the top of the structure. A new pen is introduced, but after a few marks, we return to using the Zebra pen.
Lesson 5 (1:17:01)
In lesson five, we continue with pen and ink applications on the building.
Lesson 6 (1:22:48)
In lesson six, we continue with pen and ink applications, addressing the circular element on the center of the building.
Lesson 7 (1:12:26)
In lesson seven, we begin pen and ink applications on the weeping willow tree in the middle ground.
Lesson 8 (1:07:30)
In lesson eight, we begin developing the lighter portions of the willow tree.
Lesson 9 (1:12:34)
In lesson nine, we begin drawing details and textures on the tree on the right side of the picture plane.
Lesson 10 (1:07:26)
In lesson ten, we return back to the building to work on the lower portion of the structure.
Lesson 11 (1:10:22)
In lesson eleven, we work on the tree texture on the right side of the picture plane.
Lesson 12 (1:23:38)
In lesson twelve, we complete drawing by adding the dry pond in the foreground.
Resources for this Lesson...
Distributing any content downloaded from this site is strictly prohibited and against the terms and conditions of use.
References
Here's what you'll need...
(Disclosure: Links to art materials are affiliate links which means we make a small commission if you purchase at no additional cost to you.)

Founder of The Virtual Instructor, artist and teacher. Matt makes learning art easy to understand and enjoyable.
Hello Matt,
I hope you are doing well. I am really struggling with the pencil drawing of the grid on the church. If I simplify the details on my project would that take away from using the grid?
I would use the simplified drawing for the inking part too.
I want to use the grid and not transfer as it always is difficult to me and I really desire to learn how to use the grid. i have not finished many projects for this same reason.
I am so excited for this project and thank you for picking such a challenging project. It is helping me to grow in my weaknesses.
Thank you for your help,
Teri (with 1r)
Dear Teri, are you struggling with drawing what’s in each square? I think, the best way using a grid is taking each square as a drawing itself. Maybe, it’s easier for you working with less grids leaving each grid a bit larger.
Do I make sense???
If you need a different scale, just drop me a line and I will create a new grid for you. Easy for me.
I myself use for almost every art work the grid technique, otherwise I would wrap my brain and never get proportions right. Lol, I need to practise more to not use a grid and get sketchy instead.
See you on Wednesday,
Buddy
Buddy,
Thank you for your help. It has made making the drawing easier for me.
I’ll send you a message when I get started to let you know how it goes
Artsycrochet