
Peony with Colored Pencils

Lessons
About This Lesson Series...
The Peony with Colored Pencils lesson series is a richly detailed study designed to help artists create a lifelike and expressive botanical drawing of a peony using colored pencils. This multi-lesson course guides students from initial observation and sketching through layering, refining color, and developing fine detail. By working with transparent techniques, controlled pressure, and thoughtful color transitions, artists learn to capture the delicate beauty, texture, and subtle color shifts of a peony blossom with confidence and clarity.
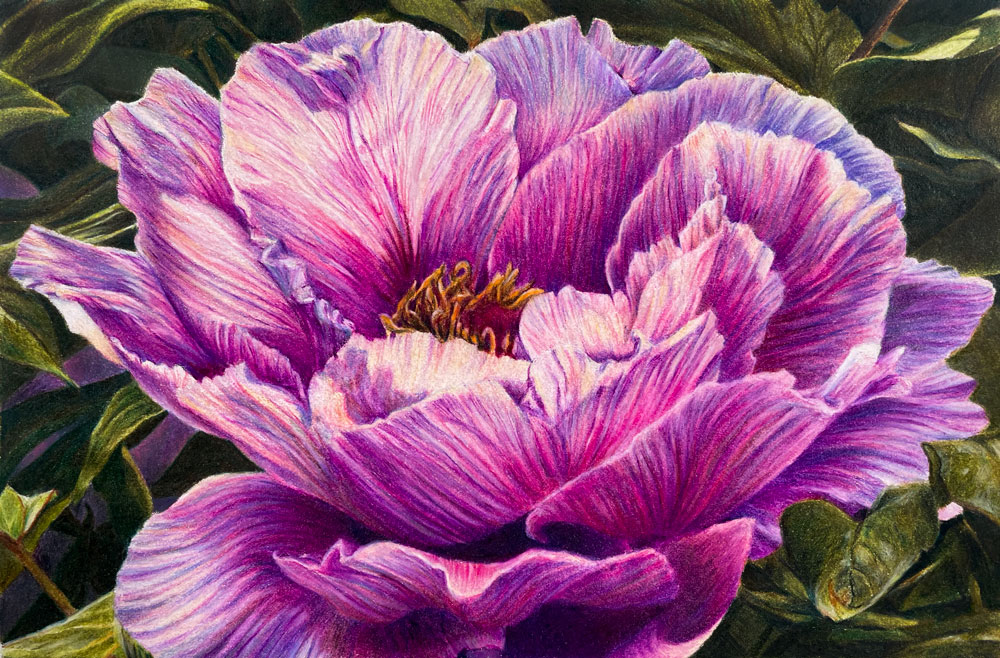
Observation and Sketching
The series begins with close observation of the peony reference, encouraging students to look beyond outlines and see underlying form, structure, and value relationships. This phase emphasizes identifying light sources, petal overlaps, and the subtle shapes that make each flower unique. Students then lightly sketch the peony on high-quality drawing paper, focusing on proportion, perspective, and composition. This foundational stage ensures the basic structure of the flower is accurate before color application begins.
Establishing the Color Foundation
Once the initial sketch is complete, students begin laying the groundwork for color. The lesson demonstrates how to carefully select colored pencil hues that reflect the natural range of peony tones. Light pressure and layering techniques are introduced to build smooth transitions between petal colors, helping to create soft gradients that suggest curvature and volume. Students learn how to keep their pencil strokes controlled and directional, following the form of the petals to reinforce structure.
Layering and Blending
With base colors in place, the lesson series moves into deeper layering and blending. Here, students learn how to build color density without losing luminosity by applying multiple layers of pencils. The instructor shows how to blend hues to enrich tone while maintaining clarity and avoiding muddy or chalky areas. This stage also addresses how to gradually shift from lighter to darker values, enhancing contrast and elevating the sense of depth found within overlapping petals.
Developing Texture and Detail
A major focus of this series is capturing the unique texture and subtle veining of peony petals. Students learn how to use varied pencil strokes, pressure control, and carefully chosen hues to suggest surface variation and softness. This lesson emphasizes refining edges, enhancing highlights, and deepening shadows to reinforce form. Fine details — such as tiny petal ridges and subtle color accents — are added to bring realism and vibrancy to the artwork.
Final Refinement and Harmony
In the final lesson, attention turns to refining the overall drawing. Students learn how to evaluate their work as a whole and make final adjustments to value contrasts, color saturation, and edges. The instructor demonstrates how to add subtle highlights to brighten focal areas and strengthen visual impact. This unifying process ensures that the final drawing feels cohesive, balanced, and complete.
Capturing the Heart of a Flower
By the end of the Peony with Colored Pencils lesson series, students will have created a stunning, realistic flower drawing while deepening their understanding of colored pencil techniques. The skills developed — observation, layering, blending, and texture — are transferable to a wide range of subjects, making this series a valuable step in any artist’s growth.
Specific Lessons
Lesson 1 (1:21:18)
In lesson one, we draw the contours of the flower with 2H graphite.
Lesson 2 (1:15:50)
In lesson two, we begin with colored pencil applications on the largest flower petal.
Lesson 3 (1:08:44)
In lesson three, we continue work on the flower petals.
Lesson 4 (1:23:28)
Work on the petals continues.
Lesson 5 (1:07:46)
In lesson five, we begin developing the leaves in the background.
Lesson 6 (1:14:48)
In lesson six, we address the center of the flower and continue working on the surrounding leaves.
Lesson 7 (1:12:11)
In lesson seven, we continue with the surrounding leaves.
Lesson 8 (1:13:19)
In lesson eight, we return to work on the lower flower petals.
Lesson 9 (59:53)
In lesson nine, we complete the flower petals at the bottom of the picture plane.
Lesson 10 (1:10:47)
In lesson ten, we complete the drawing.
Resources for this Lesson...
Distributing any content downloaded from this site is strictly prohibited and against the terms and conditions of use.
References
Here's what you'll need...
- Stonehenge Paper
- 2H or H Graphite Pencil
- Colored Pencils
- Ruler
- Kneaded Eraser
(Disclosure: Links to art materials are affiliate links which means we make a small commission if you purchase at no additional cost to you.)

Founder of The Virtual Instructor, artist and teacher. Matt makes learning art easy to understand and enjoyable.
Thanks for all the info on grids. Also, it’s great to see Ashley along with you. Together, you add some “color” and fun to the lesson!
trying to decide between FABER Castel and Prismcolor. I have a Prismcolor premier 36set and a watercolor set 36 . Can you talk about difference in sets and would using both combined for this project work. thanks ,tom
.
Sorry ,forgot to mention my concern is with the blending of prismcolor premier and the watercolor
tom
Hi Tom,
Watercolor pencils and colored pencils are very different from each other. For this series, it may be best to leave the watercolor pencils in the box and only use the colored pencils. This lesson may help…https://thevirtualinstructor.com/blog/colored-pencils-vs-watercolor-pencils-vs-the-others
What ways in to your decision to burnish vs adding more layers?
Matt, I had to miss the last two lessons due to family commitments. I am trying to catch up by viewing the recorded lessons. Lesson 6 is not working for me. It keeps stopping and not reloading. I was wondering is it my feed or is there a problem with lesson 6? I’ve enjoyed so much your lessons. I’ve learned a tremendous amount of information about art from you.
Thank you
Sandy Cain
Matt the feed is working great now. It could have been the weather here in WV we are having a windy, rain day!
I am enjoying following along with these recorded lessons, and learning so much. I am excited that getting sketchy is back to, I ll catch up with that one tomorrow
When does the next live section start and what are the materials? I want to challenge myself to keep up as you go along.
Hi Matt,
Love being your student as you share an enormous amount of experience explained perfectly for a beginner! Can students access resources photos, as well as an exact list of the materials you use for each lesson? If so, I’ve been unable to find where. If not, could that information be provided prior to the lessons? Lack of that info causes me to be stuck during lessons. Appreciate your time, lesson plans and the media range covered!
Laura F.
Hi Laura,
There is a tab labeled “Resources” under the video. There you can find the photo references. Since this lesson series is still ongoing, I haven’t listed the exact colors. I actually don’t like doing this. Although I do call out the colors used in the lesson, I’d rather you try to match the colors. You learn more about color mixing this way and become more independent as an artist.
Thanks Matt
Can you please remove the paper towel
away from flower. Thank you
Can you please remove the paper towel
away from flower. Thank you
This is the first time that I’ve mentioned this……
I love you guys, and appreciate your humor. It takes away any stress I feel about doing a drawing. I do have a question about your beautiful photo reference. If I were to make a stellar drawing from your lesson, can I sell it? Could I use it on the cover of a book that might sell a bunch of copies? Is it only for use in teaching and lessons ? I don’t want to get in any trouble for violating somebody’s copyright.
I just saw something I had overlooked on this page:
Distributing any content downloaded from this site is strictly prohibited and against the terms and conditions of use.
I think maybe my question is answered. Right?
Except you have teaching plans and the instructor would probably distribute copies of something from the lessons. So I still don’t know
Would the grid process work in procreate?
Greetings, Would Pastel Pencils work for this lesson?
Hi Linda,
You can use any medium that you wish, but pastel pencils will behave differently than the wax-based colored pencils.
Hi! I am excited to tackle this project, but have a question first. I have several brands of drawing pads, but not Stonehenge. I already own Canson and Strathmore Drawing paper pads; would either of those be decent substitutes or do you strongly recommend Stonehenge? My reason for asking is that I’d have to order the Stonehenge paper and wait several days, since it’s not available where I live.
Is it possible to get a list of the color pencils used? Or is that information right under my nose and I’m missing it. I got the paper you said to get.
Thanks
Jill
Hi Jill,
I do call out the colors as they are added, however I am hesitant to list colors used since other folks may use different brands of colored pencils to arrive at a similar result. I think it’s a good idea to get in the habit of matching your colors as best as you can. This way you can better make these decisions when you are creating your own art.
Matt, whenever you talk about your crazy experiences, I am forcefully reminded of the Disney show “Milo Murphy’s Law.” The main character is a descendent of the guy who discovered Murphy’s Law (anything that can go wrong, WILL go wrong), and it always goes into effect when he’s around; the show follows his crazy misadventures (he is very resourceful, though). So, whenever you regale us with a crazy story, I think “Maybe he’s a Murphy!”😂
I just can never get started always seems i need to re log in ?? every time just loving computers? I ill try again?
I use light peach as a substitute for pink rose what should I use as a substitute for the colour you used to build up wax and to create lighter values?
Sorry I meant Pete rose
Profiled edited. I drew the grid about 5 times and I probably still left something out. I match the colours, but I can’t say I have done a good job.
I definitely need more practice. When you do each petal of the peony do you start the base with soft rose on each petal. I did black and white pictures for a number of years and I decided to try a few different mediums, but will have to see how this comes out.