
Sunrise with Oils

Lessons
About This Lesson Series...
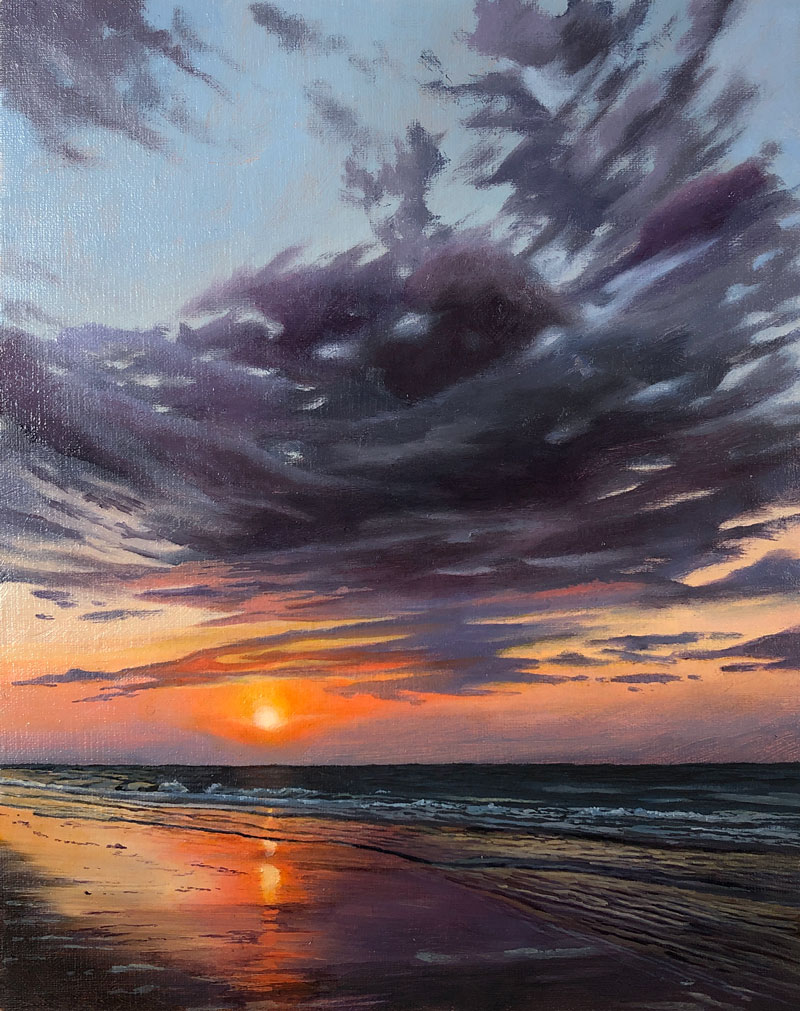
The Sunrise with Oils lesson series is an inspiring and comprehensive oil painting project that teaches artists how to create a luminous seascape featuring a sunrise over the beach. This multi-lesson series guides students through every stage of the painting process on a canvas or panel, from planning and sketching to color, atmosphere, and final refinement. Designed for both beginners and intermediate painters, the lessons focus on understanding light, color temperature, and brushwork so you can capture the serene beauty of an early morning landscape with confidence.
Lesson 1: Materials, Strategy, and Underpainting
The series begins with a thoughtful introduction to materials and painting strategy. You’ll learn about essential oil painting tools — including brushes, palettes, mediums, and paints — and how each can be used effectively for landscape work. The instructor also covers canvas preparation and how to establish an underpainting that sets the tonal foundation for the sunrise scene. This initial stage ensures you’re ready to build color and atmosphere systematically.
Lesson 2: Sketching and Composition
Before color is applied, you’ll map out the landscape with a light sketch, placing key elements such as the horizon line, shoreline, and distant landforms. This compositional planning helps ensure proportional balance and visual harmony throughout the painting. You’ll learn how to simplify complex forms into basic shapes and how to adjust your design early, before paint touches the surface.
Lesson 3: Blocking in Color
With the composition established, the third lesson focuses on blocking in the basic colors of the scene. You’ll use thinned paints to establish broad areas of sky, water, and sand, creating a cohesive color foundation. This step sets the stage for refining tones and establishing value relationships that suggest early morning light and atmospheric depth.
Lesson 4: Developing Light and Atmosphere
In this lesson, attention turns to the sunrise and its effect on the sky and water. You’ll learn how to mix and apply warm and cool colors to suggest the glow of morning light, as well as how to blend edges to create smooth gradients in the sky. Techniques for painting reflected light on the wet sand and water surface help bring the scene to life with luminosity and mood.
Lesson 5: Refining Detail and Enhancing Depth
As the painting progresses, the focus shifts to refining details and enhancing depth. You’ll learn how to articulate subtle shapes in the foreground, such as textured sand and gentle surf, while adjusting nearby color values to maintain harmony. The series emphasizes how to strengthen focal areas without competing with the overall serenity of the sunrise.
Lesson 6: Final Touches and Polishing
The final lesson centers on polishing and unifying the painting. You’ll learn how to adjust contrasts, enrich color saturation, and add subtle highlights that enhance the sense of light and space. The instructor demonstrates how small refinements — such as softening distant edges or enhancing warm tones near the sun — can elevate the entire composition.
A Complete Landscape Experience
By the end of the Sunrise with Oils series, you’ll have a finished seascape painting that captures the quiet beauty of a sunrise over the beach. Through thoughtful instruction and practical demonstrations, this series helps you develop essential oil painting skills, from color mixing and atmospheric effects to confident brushwork and compositional clarity. Whether you’re new to oils or seeking to strengthen your landscape technique, this lesson series offers valuable insight and encouraging creative growth.
Resources for this Lesson...
Distributing any content downloaded from this site is strictly prohibited and against the terms and conditions of use.
References
Here's what you'll need...
- Canvas, Canvas Board, or Panel
- Water-Mixable Oils
- Bristle Brushes
- Medium

Founder of The Virtual Instructor, artist and teacher. Matt makes learning art easy to understand and enjoyable.
Hi Matt!
Just gotta tell ya!
It’s the very first time for me with oils and I have just
made the most beautiful mess!!
(by mess, well, i mean…ahem…i did not quite follow the rules, not even the pic much)
Well, I mean…I just couldn’t
help myself and it was so much fun….
kinda got carried away….(smiling!)
But I know we are not finished yet…
I know this is just the beginning of a beeautiful friendship with oils!
Matt..
The panel back says ‘oil primed’ yet you said you painted a layer of acrylic over that. Am I missing something? I thought it was very bad to paint acrylics on top of an oil based layer.
Hi Laura,
Yes, you don’t want to apply water-based media over oil paint. This is because oil paint dries very slowly (sometimes weeks) and will prevent the water-based media from adhering to the surface. This canvas however is simply primed with an oil-based primer and was completely dry and wrapped in cellophane. There wasn’t a layer of oil paint on the surface when I applied the acrylic ground. If it were, it would have been catastrophic and the acrylics would not have laid on the surface or dried completely.
I use white gesso which is acrylic based and is used for this specific purpose.It can be purchased at any hobby shop or online or any other art supply store.
Hello Matt,
Please would you let me know what you do with any left over paint? Do you just wash it away? Also, how do you work out how much paint to load onto the Palette. I’m just a beginner and never used oils, in fact only just done one water colour at the evening class I attended and that didn’t go down too well.
Thank you. I enjoy your classes.
I was interested in this class, but cannot access the lessons or even ppt resource for steps. How come this is out of reach? I am enthusiastic about this site but frustrating to have walls up after I paid…
Connie
Hi Connie,
I’m not sure what you are referring to, but you were able to post on this page which means that you have access to it. The lessons are presented as videos above. You can go to the next video by clicking on the buttons beside the video or by clicking on the links under the lessons tab. There is not a PowerPoint presentation for this lesson. PowerPoints are only included as part of the Ultimate Lesson Plan lessons which are intended for teachers to use in their classrooms. This is a Live Lesson series which is a series of video lessons. There are no walls. You have access to everything.
What date are you doing the glazing?
Do we need water mixable oil or can I use traditional oil paints.
Hi Sahara,
You can definitely use traditional oils.
Where can I find the paint colors listed. Do I need to listen to the beginning and try to catch what colors. Under materials it just reads paint no specific colors.
Hi to both of you!
I just finished the second lesson. My first experience with oils (I’m a colored pencil person mostly). When we finished, I had a color of peachy orange that was perfectly fine for a sunrise, but not the specific color orange I was going for. So I took the opportunity afterwards to play around with mixing colors. I found it to be much, much harder than I had expected! It made it easier to understand the story about the guy who had 25+ colors on his palatte. Is this typical of oils? Are there tips for making it easier without using tons of paint? Etc.? My example – I had a peachy color at first that then turned more into a light-tomato-ey shade. When I added more yellow, it just became more of a darker tomato color. Eventually, I got what I wanted, but I’m not sure how. This is fun, though!