
Bee with Colored Pencils

Lessons
About This Lesson Series...
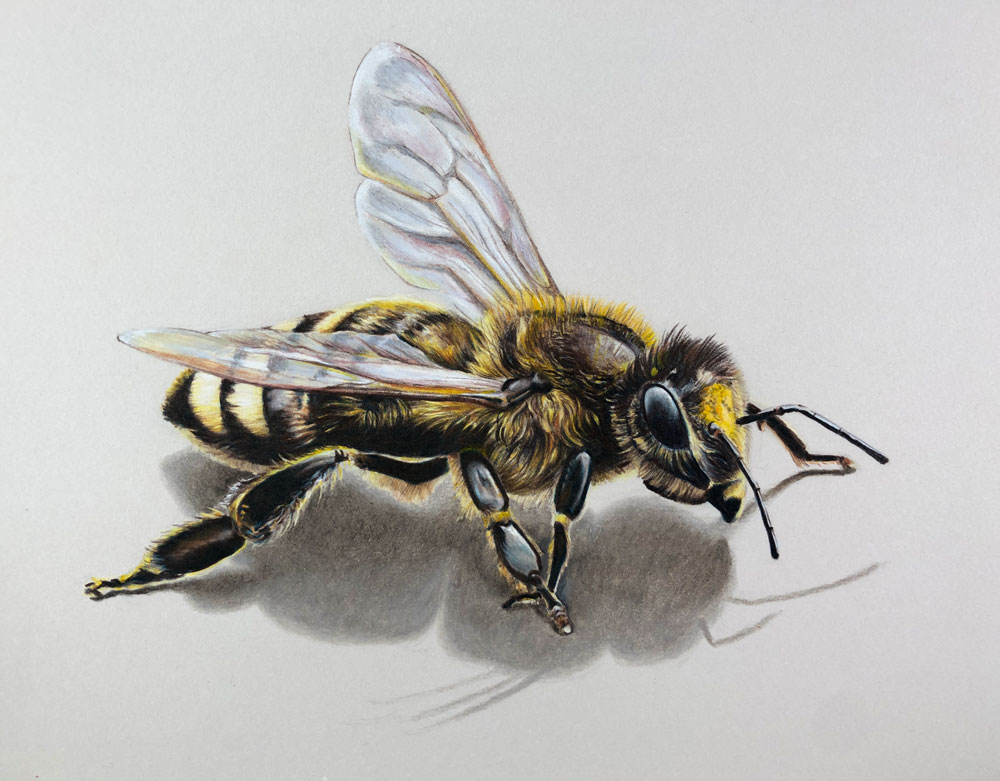
The Colored Pencils – Bee lesson series is a richly detailed exploration of colored pencil drawing that teaches artists how to create a realistic and vibrant depiction of a bee on slightly toned paper. Across eight lessons and roughly eight hours of instruction, students are guided step-by-step through the entire process — from initial sketch and layout to layering color, developing form, and finishing with subtle details and cast shadows. This series is ideal for artists who want to improve their colored pencil technique, deepen their understanding of color layering, and learn how to capture texture and depth in a lifelike subject.
Lesson 1: Drawing with Basic Shapes
The series begins with a focus on observation and structure. In the first lesson, the instructor discusses how to break down the bee into basic shapes and use those to create an accurate graphite sketch of the subject. This stage emphasizes proportional accuracy and placement, ensuring that the foundational drawing supports the detailed color work that follows.
Lesson 2: Beginning the Head
With the initial sketch in place, lesson two transitions into colored pencil application. Students begin working on the head of the bee, learning how to develop rich color by layering pencil strokes and controlling pressure. Careful attention is given to subtle variations in hue, value, and texture that help describe the bee’s facial features and compound eyes.
Lesson 3: Middle Section
In the third lesson, students continue down the bee’s body, working toward the thorax. This segment highlights how to blend colors to suggest volume and form. By gradually building up layers of pigment, artists learn how to transition smoothly between adjacent color areas, maintaining vibrancy and dimension as they progress.
Lesson 4: Completing the Thorax
Lesson four focuses on completing the thorax and adding additional detail. The instructor demonstrates how to integrate texture and deepen values while preserving the natural highlights and color relationships. This lesson continues to reinforce how layering and blending can create the illusion of three-dimensional form.
Lessons 5 & 6: Abdomen and Wings
In lesson five, students complete the bee’s abdomen and begin work on the wings. Here, attention turns toward indicating structural differences between the solid body and delicate wing surfaces. Lesson six continues work on the wings, with demonstrations on how to suggest transparency and subtle shifts in value that make the wings appear light and lifelike.
Lessons 7 & 8: Legs and Cast Shadow
The final lessons focus on finishing the wings, drawing the bee’s legs, and adding a cast shadow beneath the body to anchor the subject on the page. These finishing steps refine contrast, enhance realism, and give the drawing a sense of place and visual weight.
A Complete Colored Pencil Experience
By the end of the Colored Pencils – Bee lesson series, students will have completed a detailed and vibrant drawing that demonstrates effective use of color layering, texture, and observational accuracy. The skills developed—careful sketching, controlled color application, and thoughtful contrast—are transferable to many other subjects, making this series a valuable study for colored pencil artists at multiple skill levels.
Here's what you'll need...
- Graphite pencil (H)
- Toned Drawing Paper
- Colored Pencils
- Kneaded Eraser
- White Gouache
- Nylon Brush

Founder of The Virtual Instructor, artist and teacher. Matt makes learning art easy to understand and enjoyable.
I wish you would have the reference visible as you are drawing.
Hi Jennifer,
The reference photo is shown in the upper right corner of the video during the process. You can also download the reference photo from the resources tab.
it always gets me when I see these messages.. I learned early on, open the image in a new browser and minimize it. put to in the corner and open up the video and watch, and you can see the reference right there in the corner. hope this helps.
okay, you finally did it at 31:53.Thanks.
I have the reference as well. :o)
Also, I going to change the position of the front leg. Ha
Just a suggestion — but I print the reference out and tape it to the side of my IMac which makes it easier to refer to, at least for me. Hope this helps. Anne
Hi Matt, I Just came across Prismacolor Verithin today. It has a thin core and is made for making thin lines and marks. Because of the thin core it has a harder wax core, which means you don’t have to sharpen it as often to keep the sharp point. It’s not meant to react like regular colored pencils like blending or covering larger areas of a drawing. I ordered it in the 36 pencil set, which is the largest set. The only place I found it was on ebay, new, and only 22.00. Can’t wait to try it on this project. Do you know of it?
HI Marjorie,
Yes, I am familiar with Verithin pencils. These Prismacolor pencils are hard. As a result, they will not behave in the same manner as the Premier pencils – which are soft. They are great for adding details though and do keep a sharp tip. You can think of these variants in the brand like graphite – “H” pencils are harder much like the Verithin pencils, while “B” graphite pencils are softer – much like the Premier pencils.
will you show us sharpening the prismacolor pencils. i have yet to settle on a method. It does not appear that you are using a utility knife. thanks tom
Hi Thomas! I use a double helicoidal sharpener from X-Acto (crank type similar to the sharpeners we used to have in school years ago…). It works well on my Prismacolor pencils. I know that Matt uses a simple, hand held sharpener and that works well too. The secret is often in not forcing the pencil too far in the sharpener and in using a gentle motion. Good luck.
I’ve been using the hand sharpener sold by prismacolor. I figured I can’t go wrong using the same sharpener they sell, and the price was decent. So far it has not chewed up a single pencil, unlike others I’ve had. It has two point choices, longer & thinner or shorter & fatter.
Jennifer – Just a suggestion — but I print the reference out and tape it to the side of my IMac which makes it easier to refer to, at least for me. Hope this helps. Anne
Looking forward for lesson 3 (which was scheduled last Wednesday)
Hi Corinne,
Lesson 3 was broadcast live on Wednesday. The recorded version of this lesson does take some time to render, upload, and then post. The recorded versions are typically posted Friday or Saturday following the original broadcast.
Hi FYI worker bees are female drones are male and have much larger eyes
I am loving this pencil work its really interesting finding out the colour contrasts and how to make black
Carrol
HI
I AM unable to do lessons on line as I am in AUSTRALIA I have managed to do lesson 3 and really enjoying it looking forward to lesson 4
Carrol
I’m a new “student” here. Your video quality is exeptional. So crisp, well lit, color grading is great. I know that’s not an accident.
Thanks Chris!!! Yes, I’ve had to learn a lot since I began over 10 years ago. Thanks for noticing the little things that people don’t usually know about or notice.
have u considered calling them bee feathers?lol
Mat I am 71 and new to drawing. I LOVE YOUR SITE! Your directions are just what the doctor ordered. I have been skipping around, but now getting down to the basics. I am happy with my drawings following along with you, but left to my own demise the curve drops. Consequently, back to your basics. Guess one has to learn to crawl, before walking and running…Thank you for a wonderful site. I am thoroughly enjoying it!
Hey, Matt. I have Prismacolor premier pencils and my dads berol Prismacolor pencils. Is it okay to mix them together? Also i was wondering which one has better pigment. 🤔 thanks, peter.
Hi Peter,
Yes, absolutely you can use them together. I can’t say which form of the pencils are more pigmented, but I can say that the Berol pencils will break less frequently.
Hi, Matt,
I am enjoying this series because I do colored pencil work and always learn a lot from you. I’ve been a member for about 3 years and have looked at almost all of the videos on your site, including the ones on painting because they are so informative. I watch them while I’m on the stationary bicycle, so you’re responsible for not only bettering my art but also improving my health!
I just wanted to let you know that there is a colored pencil white powder designed for highlights. It needs to be mixed with a special liquid and then applied with a brush https://www.dickblick.com/products/brush-pencil-colored-pencil-titanium-white/
Sometime in the future, could you do a demo or lesson series on watercolor pencil on colored paper???
This is my first attempt at colored pencils and I am in love!!! I have also enjoyed the various opportunities available on the website and have referred it to six of my business partners (who love to dabble in art too). Thank you for such a well organized site for art enthusiasts.
Thanks Jolaine!
It would be cool if you listed the PC color pencils with their number reference in the Materials section….
MATT – Sorry I missed lesson 6 last night but would like to know when it will be online to view and complete my picture. Thanks
how do i view lesson 6
Hi Jolaine,
The Live Lessons have to be edited, rendered, uploaded, and then coded so that they work on the page after the original broadcast. The software used to broadcast live is different than the software used to edit and render recorded lessons. This takes a little bit of time. The 6th lesson was just broadcast less than 24 hours ago. The recorded version of the live broadcasts are usually available a couple of days after they are first broadcast. Lesson 6 should be up by tomorrow. I hope this helps.
Yes, thank you. I’m excited about seeing the final results. Loving it!
I have a 60 color art set #960 from
Berol Prismacolor
Danbury, CT 06810
given to me as a gift in 1965. Although I have not worked much in colored pencil in the past they are nice pencils with which to work and your classes have allowed me to enjoy them even more. Thanks
Colored pencil is my zen — I get lost in the combined drawing and color application process; frustration disappears and time melts away.
Watching your individual colored strokes take image form is mesmerizing.
Thank you for showing the drawing nature of the medium. Your explanation of color choices and combinations is very informative and much appreciated. It seems today’s trend is to turn colored pencil into paint with the use of dissolving mediums — no zen. It is inspiring to see the medium used in its original, unique, creative way.
I have painted a picture from one of your previous lessons and I am pleased with the outcome. My question is: I plan to enter the State Fair with a few of my paintings but do not want to ever put myself in a position where I am criticized for using someone else’s art. Do you allow (or object) to a student using your example and submitting it in a juried show.
Where is lesson 7
HEY MATT: I have painted a picture from one of your previous lessons and I am pleased with the outcome. My question is: I plan to enter the State Fair with a few of my paintings but do not want to ever put myself in a position where I am criticized for using someone else’s art. Do you allow (or object) to a student using your example and submitting it in a juried show.
Reply ↓
Hi Jody,
I know I already answered your question through email, but for all that may read this – I’ll answer it again here, since I get this question a lot…You are welcome to do whatever you wish with the drawings and paintings that you create from the lessons on this site. However, keep in mind that hundreds – potentially thousands of other people have done the same drawings and paintings. This really takes away from the originality of what you create. I would suggest taking what you learn during the creation process and then apply your knowledge to your own drawings and paintings.
Hi Matt,
I haven’t been able to attend live lessons for the past several weeks, due to some health issues (which are now better). I just wanted to stop in here, to say that I truly appreciate your posting the videos for us to either view later or download. Much appreciated! 🙂
the bee looks so realistic in the end!
Hello Matt, Just wondering you mentioned you have every color of the Prismacolor Premier range… I received my 150 pack the other day is that the whole range ? I would like to have the entire collection … Thank you so much Trish M
Matt you have so many wonderful pieces of artwork to add to your collection, you inspire me so much! Thank you!
Hope you are feeling better,
Hi Seema,
This image is from pixabay.com
actually wondering,
in the material list you wrote down toned paper.
Is it like grey toned? because the white prismacolor is good to see there and on your drawing as well.
Hi Lele,
Yes, the paper is a very light, warm gray.
I don’t have any greys in my set.What do you think I could use as an alternative?
I would order the missing the pencils if you want an exact match. The only other alternative is to mix your own greys.
In the end I just used silver and burnished with white 🙂
I love & appreciate your laughter!
I just finished this drawing (with Faber Castell Polychromos.
It was hard working but I enjoyed every second of this lesson. Inclusive the barking dogs…
Could you list the Prismacolor names and numbers used during the entirety of the lesson. I sent this request via your contact link but never received a response. Thanks
Any acknowledgment will do?