
Realistic Portrait Drawing with Pencil

Lessons
About This Lesson Series...
The Realistic Portrait Drawing with Pencil lesson series is an in-depth and highly instructional study in creating a lifelike graphite portrait of a young girl. Spanning multiple lessons, this series guides artists through the complete portrait-drawing process — from initial observation and layout to refined shading, subtle detail work, and expressive mark-making. While technically demanding, the lessons are presented in a clear, encouraging manner that helps artists of varying experience levels deepen their understanding of proportion, value, texture, and expression in portraiture.
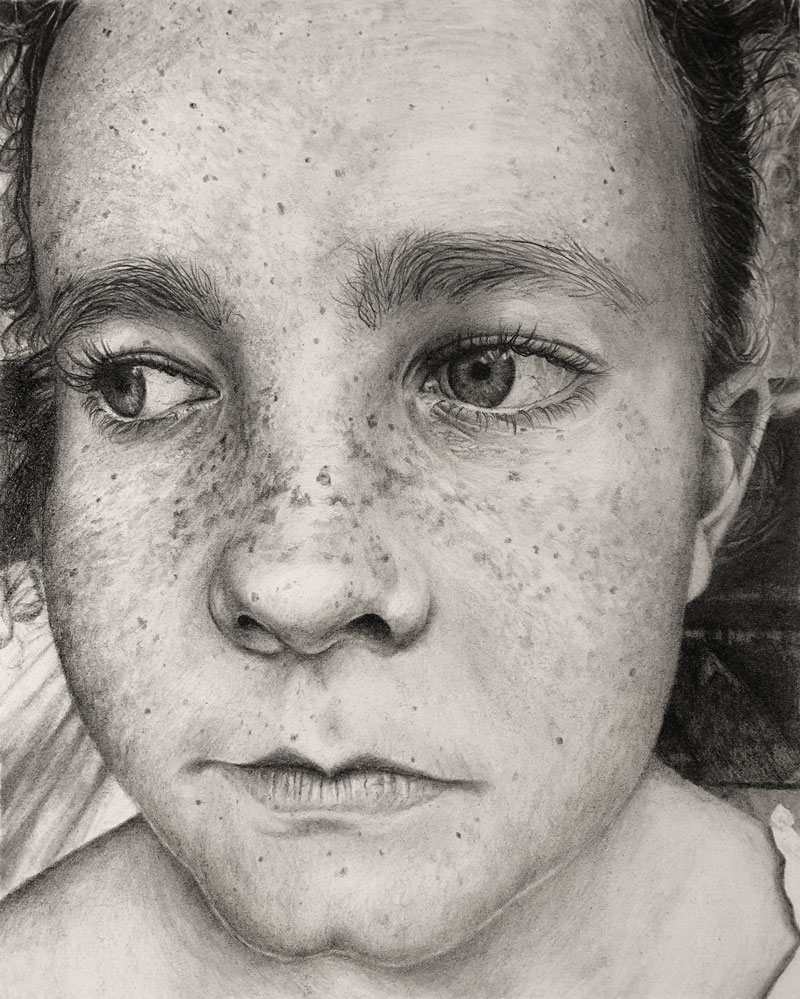
Observation and Understanding Form
The series begins with careful emphasis on observation — the cornerstone of successful portrait drawing. Students are taught to look beyond surface likeness to understand the underlying structure of the head and face. Seeing relationships between angles, planes, and proportions helps ensure that early marks are accurate and meaningful. This foundation in true observation prepares artists to translate what they see into convincing pencil work rather than relying on assumptions or guesswork.
Creating the Initial Layout
Once observation has been cultivated, the first drawing phase focuses on establishing an accurate and well-proportioned layout. Using light graphite pencils, students map out the overall shape of the head, placement of features, and key landmarks such as the eyes, nose, and mouth. This initial layout is critical because even small errors in proportion can affect likeness later. The instructor demonstrates how to measure, compare, and adjust the drawing gently until the proportions feel balanced and natural.
Developing Value and Form
With the basic structure in place, the lesson series moves into shading and value development. Students learn how to build a full range of values — from the lightest highlights to the deepest shadows — that give a portrait its three-dimensional quality. Through careful layering and controlled pencil pressure, the drawing gains depth and volume. The instructor also teaches how to avoid common pitfalls such as over-blending or flattening values, emphasizing instead how subtle transitions create lifelike form.
Refining Features and Expression
As the portrait progresses, attention shifts to refining key features. The eyes, often described as the soul of a portrait, receive special focus, with instruction on capturing their subtle reflections and depth. The nose, lips, and hair are also developed with careful observation of edge quality, texture, and value relationships. Throughout this phase, students learn how slight adjustments in value and shape can dramatically improve likeness and expression, making the portrait feel alive and present.
Texture and Edge Control
A major component of this series is understanding how to use texture and edge quality to enhance realism. Students learn when to soften edges to suggest gradual transitions and when to sharpen details to draw the viewer’s eye. The instructor also explores how different pencil grades — from hard to soft — contribute to surface quality and subtle detail, whether capturing the smooth plane of skin or the delicate strands of hair.
Final Harmony and Finishing Touches
Towards the end of the series, students focus on unifying the portrait, evaluating values, and making final adjustments. Enhancing contrast, refining highlights, and balancing all elements of the drawing ensures that the finished piece feels cohesive and complete. By the end of the Realistic Portrait Drawing with Pencil series, students will have developed a striking graphite portrait and gained a deeper understanding of the skills required to draw convincing, expressive human likenesses.
Resources for this Lesson...
Distributing any content downloaded from this site is strictly prohibited and against the terms and conditions of use.
References
Here's what you'll need...
- Graphite Pencil Pencils
- Canson Heritage Hot Press Watercolor Paper
- Kneaded Eraser
- Ruler

Founder of The Virtual Instructor, artist and teacher. Matt makes learning art easy to understand and enjoyable.
I was just reading that it was a blood clot that left Chuck Close a paraplegic.
The documentary I saw didn’t elaborate so it was probably more involved.
I got distracted weds. night-just watching this now. I really like having Ashly (SP?) making comments.
I’m still watching the 1st lesson but would you comment on the position of your hand on the pencil if you haven’t already. i notice that you are high up on the pencil as opposed to close the point.
thanks tom
Is using a proportional divider a bad habit to get into when working from a grid?
Hi Dominica,
There are plenty of bad habits out there, but I don’t believe using devices to ensure accuracy is one them 🙂
There was alot of talk of photoshop in lesson 6.. If there is someone who is somewhat tech savvy there is a program called Inkscape to download which is free. There is also a website called ipiccy.com that will allow photo manipulation right on the webpage, it is also free.
GIMP is a free program for photo manipulation that allows for putting grids on images.
Hello,
I did the whole portrait but there’s something that is no the expression. I don’t know where is the problem. How can I find the problem?
I heard you talk about the grid technique before on how you make the grid. The thing is, if you make a screenwriter of your drawing, the quality of your image decreases tremendously. If you find a grid online, it may not align properly to your particular image. Normally I use a layout of guidelines, and then use the line tool in Photoshop. The lines will automatically align to the guidelines. It’s a little bit more work, but it works without decreasing the quality of the image.
Hi Matt
What is the name of the “mechanical” eraser you use ?? Tiny round and long for fine erasures!
TY
Hi Leslie,
It is a generic one that was purchased from amazon. Here’s a link to one that is exactly the same…https://amzn.to/3VG8AoW
I recently took your “Portrait Drawing the Smart Way.” Could you tell me how this class differs? Thanks!
This is a class series, with real-time instruction. In this class series, we create one finished drawing with just graphite. In Portrait Drawing The Smart Way, several drawings are completed while teaching concepts on capturing accuracy in a portrait. Portrait Drawing The Smart Way also uses graphite and white charcoal together. This series is quite different from the course. Have you watched this series?
No, I haven’t watched this series. I’m trying to decide whether to purchase it Thanks for pointing out the differences.