
Rhino with Graphite and White Charcoal

Lessons
About This Lesson Series...
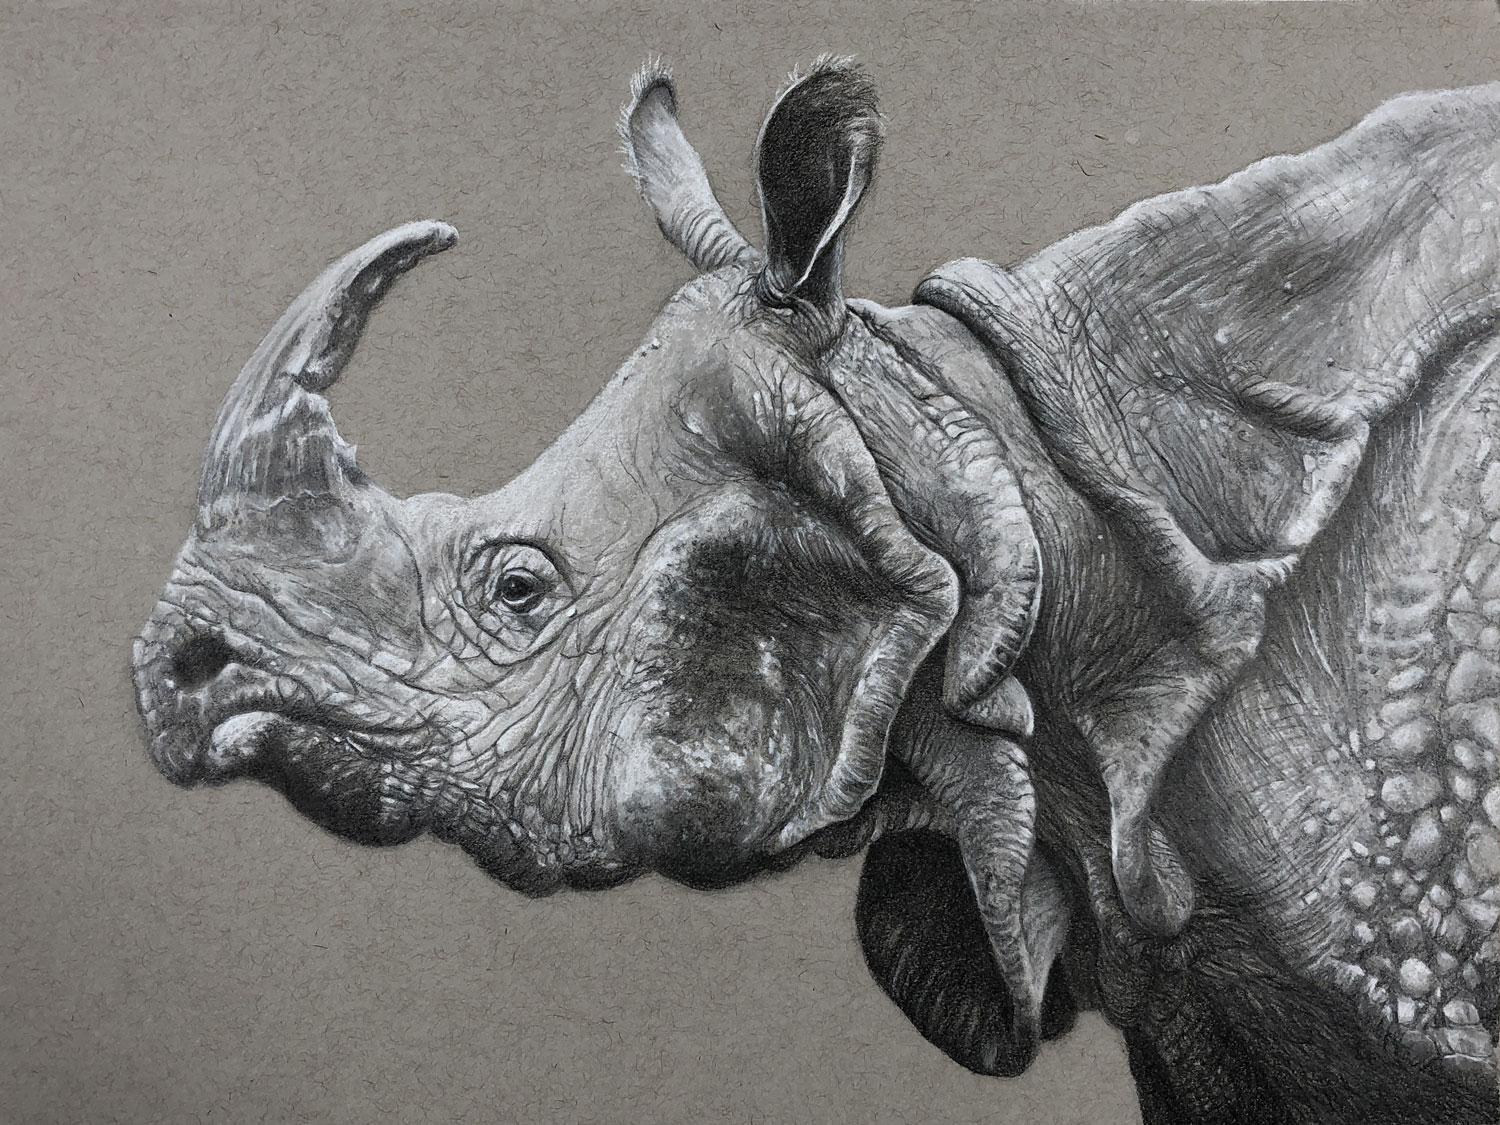
The Rhino with Graphite and White Charcoal lesson series is a richly detailed, step-by-step exploration of drawing a rhinoceros using a combination of graphite pencils and white charcoal on gray paper. This series guides artists through the full process of creating a highly realistic and expressive animal portrait, emphasizing careful observation, accurate value relationships, and thoughtful mark-making. By working on toned paper and using both dark and light drawing media, students learn how to portray form, depth, texture, and volume with confidence.
Observational Foundation
The series begins by emphasizing observation as the cornerstone of realistic drawing. You are encouraged to look beyond outlines and focus on how light interacts with the rhino’s surfaces — how highlights wrap around contours, how shadows define planes, and how subtle transitions connect form to environment. This careful study prepares you to interpret visual information rather than rely on guesswork, giving you a strong foundation for the technical work that follows.
Setting Up the Composition
Once observation has been cultivated, the process begins with setting up the composition on gray toned paper. Students start with a light graphite sketch that establishes the overall proportions and posture of the rhinoceros. The instructor demonstrates how to accurately place major forms — the head, shoulders, horn, and body — while maintaining dynamic balance throughout the composition. This careful planning ensures that the drawing feels grounded and structurally sound before deeper value work begins.
Building Dark Values with Graphite
With the preliminary sketch in place, the lesson series transitions into value development using graphite pencils. Here, students explore how to build rich dark values while maintaining smooth transitions. Graphite grades are chosen strategically to define deep shadows, midtones, and contour accents. You’ll learn how to vary pressure and layering to suggest mass and texture, giving the rhino a convincing three-dimensional form. This phase teaches you not just to darken areas but to understand how value shapes create the illusion of depth.
Introducing White Charcoal for Highlights
A distinctive feature of this series is the introduction of white charcoal to establish highlights and refine form. Working on gray paper allows white charcoal to stand out with luminosity while reinforcing volume and contrast. The instructor demonstrates how to use white charcoal to emphasize light hitting the rhino’s horn, forehead, ears, and other textured surfaces. These bright values help the drawing feel alive, giving emphasis to key areas while enhancing the overall structure.
Developing Texture and Detail
As the drawing progresses, attention turns to developing fine texture and realistic detail. Students learn how to suggest the unique hide of the rhinoceros — rough, folded, and full of subtle variations — by combining layered graphite with strategic white charcoal highlights. Techniques such as varied line direction, controlled smudging, and careful edge management help convey the tactile quality of the rhino’s skin without overwriting or losing clarity.
Final Refinement and Harmony
In the final stages, the focus is on harmonizing values, strengthening contrast where needed, and refining edges for maximum impact. The instructor shows how to unify the drawing as a whole, ensuring that highlights, shadows, and midtones work together to create a cohesive and polished piece. By the end of the series, you will have completed a powerful and expressive rhinoceros drawing while mastering techniques that can be applied to other subjects and mediums.
Here's what you'll need...
- Graphite pencils (H, HB, 2B, 4B)
- Toned gray drawing paper
- White charcoal pencil
- Kneaded eraser
- Blending stumps

Founder of The Virtual Instructor, artist and teacher. Matt makes learning art easy to understand and enjoyable.
The rhino drawing was very informative. We enjoyed the way you exposed your thinking as you went along – very helpful! We are looking forward to lesson 2 of this series.
Merry Christmas and Happy New Year to you.
Rhino horns are removed for their protection and the preservation of the species. Rhinos are a target for poachers as rhino horn has value when sold for Eastern medicinal use. This is extremely sad because rhino horn is nothing but the protein keratin – the same thing as human nails and hair. By removing the horns of wild rhino, poachers have no interest in poaching them because they have no monetary value. The use of tiger bone, bear gall, and rhino horn in eastern medicine as well as the use of elephant ivory for adornment, has lead to untold suffering, orphaned- and often the death of- offspring and the destruction of these species. While illegal, there is still a thriving black market. Just thought you should know…
Now that I’ve climbed down from my soapbox… I’ve been a member for almost a year and my New Year’s resolution is to be more active. I confess, I’ve been more of an observer of the site rather than a participant. As I’m sure you now know, I am very passionate about wildlife. I was initially trained as a biologist and I spent 20 plus years in the field in post secondary education. I’ve always loved to draw and paint but never took these activities seriously as I never had much time to devote to them. With my retirement last summer, I hope to have more time to do these things! I was thrilled to see the chubby unicorn as the subject of this lesson. I hope to catch up and follow along! I hope everyone experiences the 2020 of their dreams!
You beat me to it Susan. The same goes for elephants.
I tried to watch this live last night! But New Year’s wiped me out lol…I’ll be catching up when I get my gray paper this week and hopefully joining you next Wednesday! Thanks so much for these live lessons! Are you planning on filling in the background or are you showing just the rhino?
Hi Rain,
I haven’t decided yet. I may just leave the background open – we’ll see.
Hi Matt: I’ve finally got started on this neat rhino…After finally finishing the sketch…which it seems I’m struggling with if i don’t use a scale divider.
I was finished with what i was thinking an incredible horn now full of values and looking pretty good…
To my dismay, turning to check the shine, which seems more than i want… realyzing that i will have a re-do…I am one of those who is guilty of going too fast?
I now have a better set up here and will not mind re-starting…
Love being able to play and replay parts of interest.
Enjoying the classes and the critiques.
This neat rhino is emerging! Albeit, finding some shine inevitable…sighs…
It def has to do with starting with a lighter h, or hb and slowly buiding up. I am falling
in love with the process though!
Not to be understated that value is relative! …had to widen his “horn” on the left, so to make it make “more sense to me”…
Got caught up in a rhythm while working on his wrinkles (lol) …which was what happened when doing the leaves as well….
made time go by and did not want to stop…
hope to be caught up by tonight’s lesson…
tata
I am patiently waiting for Lesson 6 in this series that was supposed to have been done last night. I used the grid technique to accurately develop my contour drawing. So far I am pleased with my result. I am starting to recapture both texture and value variation in my drawing. The rhino is a great project to develop skills. I just wish there were more graphite and white charcoal exercises.
Hi Ed,
Glad to hear that you’re pleased with the start of your drawing. There are currently 44 lessons on the site that utilize the combination of white charcoal and graphite.
I just started a trial thinking I want to start a membership. So many of the videos seem to barely stream, they’re constantly buffering. Is this common on the site?
Hi Ian,
The videos stream in HD by default. They do not auto buffer according to your internet connection. If you’re having trouble streaming the full HD video, you may change the stream quality by scrolling over the video and clicking on the small gear icon. Choose a lesser quality and the stream should play without issue. The buffering you’re experiencing is due to a weak or intermittent internet connection.
Thank you. I learn so much every time.
An you tell me what size is this drawing? I didn’t hear you say. Thanks
Nina, I was going to ask the same question but I think it’s the same size pad that I have, 9 x 12.
Matt, I also wanted to know if you use a fix-it of some kind if you were to frame this drawing.
Thanks,
Pete
I just watched this video to the very end and hadn’t realized that Matt had answered my question.
But, why do we have to use a lighter pencil first and then go darker. Why can we not just use a pencil shade that will give us the shade we aim to achieve one and for all, will doing this not also help in keeping the paper tooth Intact to reduce the graphite shine? Instead if building and building on a shade. Just thinking
Hello! I am very late to this lesson as it is April now but I am enjoying it. I don’t know what you named your rhino, but I am calling mine “Rona.” Rona Rhino. Done during the self isolation during the pandemic. Thanks for your free instruction.
Hi Matt:
I just bought white charcoal pencils for this project. I have never used this media before so decided to test it first and realized that the white charcoal pencil works fine by itself but it just slides off the graphite marks. Now I am wondering about the quality of the charcoal pencil. I definitely cannot start this drawing with the ones I have. Is there a particular brand of charcoal pencil that I should use? Thanks!
Hi Ujwala,
It’s not the quality of the charcoal. Please be sure to watch the lesson series. The order in which you apply the medium is important. You must preserve the areas of highlight and lighter value. The white charcoal will not cover areas where you put moderate to heavy applications of graphite.
Thanks Matt! I should have at least started watching lesson 2 before asking the question. But, appreciate your reply.
I just wanted to say how grateful I am for this site. I started drawing about 2 years ago. Before that, thinking with the mindset of, not being able to draw something that didn’t look like It was done by my toddler. Using tutorials from all over the web has helped, but it wasn’t until I found this site that my art quality increased dramatically. But even more so was how much more I was enjoying there process. The in depth lessons on each medium along with ebooks have opened me up to trying new avenues in my art, and I’m loving every medium I put in my hands. I especially love the live lessons. To see you make every stroke with an explination on why and how you do it was just the type of instruction I have been longing for. Look forward to being a member for the foreseeable future.
Cheers
Awesome, thanks Trever!
Love your rhino so far. Thank you for this lesson so informative and helped me with getting those wrinkles. Challenging but getting there. Cheers
Sahara
Thank you for this wonderful lesson. I am originally from east africa and have seen them very closely growing up and have admired this beautiful beast and to finally able to get it down on paper was very emotional. Of course no way close to your Rhino but nevertheless it looks like a rhino and can see where my errors are for a next attempt in the future. Thank you once again.
Hi Matt! Just wondering if you had a particular brand of white charcoal pencils you recommend? Apologies if it’s mentioned in the videos, but I thought I’d ask here.