
The Charcoal Drawing Course: Portrait

Course Curriculum
Lesson Description
The Charcoal Drawing Course: Portrait lesson series is a focused and expressive study in creating dramatic portraiture using charcoal — specifically white charcoal on black paper. This unique approach flips traditional charcoal techniques on their head: instead of starting with a light surface and adding dark values, students begin with a rich black ground and build up light values to define form. The result is a luminous, high-contrast portrait that feels both striking and atmospheric.
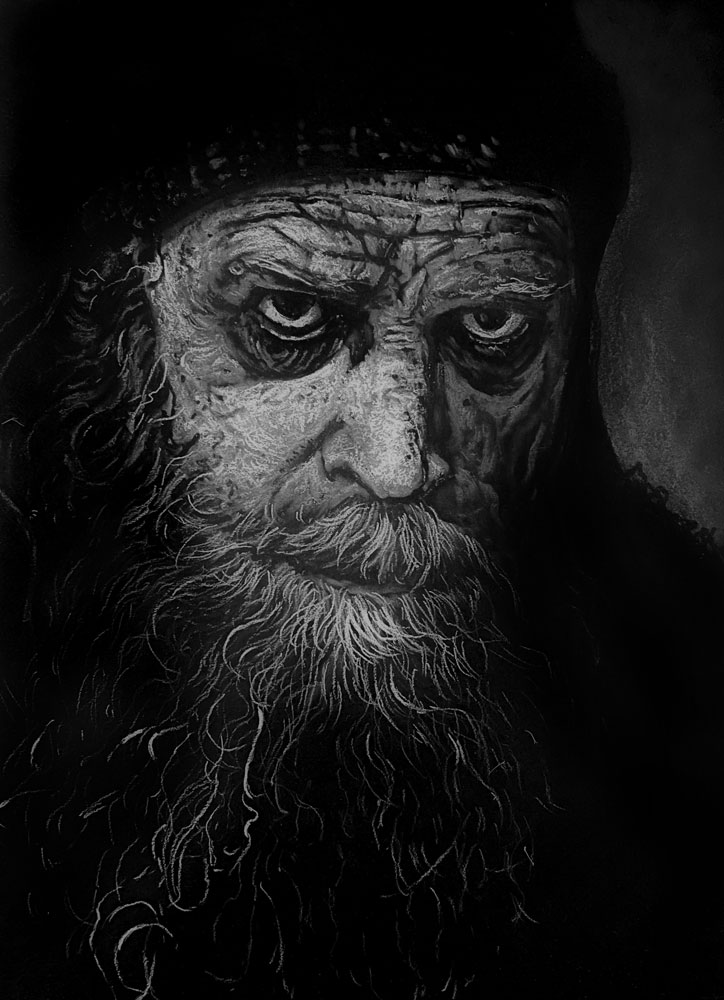
Why White Charcoal on Black Paper?
Drawing on black paper with white charcoal encourages artists to think in terms of light rather than shadow. In traditional graphite or charcoal portraiture on white paper, artists push dark values to create form; in this lesson series, you pull light out of darkness. This reversal strengthens observational skills and deepens understanding of value relationships, teaching you to see and translate the subtleties of light falling across planes of the face.
Lesson 1: Observation and Planning
The series opens with careful attention to observation. Before applying any medium to paper, students learn how to analyze the reference subject, noting planes of the face, light direction, and key landmarks that define likeness and expression. This preparatory stage emphasizes measuring proportions, positioning features, and sketching a light foundation so that the dramatic highlights on black paper can be placed accurately as the drawing progresses.
Lesson 2: Establishing the Structure
Once you understand the reference and have a light framework in place, the next step is establishing basic structure with white charcoal. This lesson shows how to mark the major lightest areas across the portrait — from the forehead and cheekbones to the bridge of the nose and lips — creating a rough map of illumination. These broad strokes help define the general form and ensure that the portrait feels cohesive before details are developed.
Lesson 3: Defining Features with Value
With structure established, students begin refining facial features through careful layering of white charcoal. Emphasis is placed on translating subtle value shifts and capturing the characteristics that make each portrait unique. Whether it’s the glint in an eye, the curve of a nostril, or the shape of a smile, this lesson demonstrates how incremental layers of white charcoal can suggest depth, dimension, and texture on black paper.
Lesson 4: Enhancing Contrast and Depth
As the portrait develops, attention shifts to deepening contrast, strengthening edges, and fully sculpting form. Students learn how to use erasers not to remove marks but to sharpen highlights and refine transitions between light values. This lesson teaches how to accentuate contrast without losing nuance — an essential skill for achieving a dramatic, believable portrait.
Lesson 5: Final Refinements and Expression
The final stage of the series focuses on polish and expression. Students learn how to balance tonal relationships, finalize intricate details, and ensure that the portrait feels unified from top to bottom. By the end of the series, you’ll have completed a dramatic white charcoal portrait on black paper and gained a deep understanding of value, observation, and expressive mark-making that can elevate all types of drawing.
Lesson Materials
- 2H Graphite Pencil
- White Compressed Charcoal Pencil
- Kneaded Eraser
- Vinyl Eraser
- Electric Eraser
- Blending Stumps or Tortillions
- Coal Black Strathmore Artagain Drawing Paper
Lesson Resources
References
Photo Reference
Finished Drawing
Download eBook

Founder of The Virtual Instructor, artist and teacher. Matt makes learning art easy to understand and enjoyable.
Gee. I had to have a peek. Matt, you keep us running. I am “retired” yet can’t get to your bajillion courses. This looks fantastic!
Sorry I had a crazy year. Mini stroke in February lost eyesight in my right eye. Carotid surgery was healing nicely and the middle of May broke out was shingles lasted for about eight weeks. Hopefully get back into your wonderful art classes soon.