
Realistic Pencil Drawing: Grid Drawing - Falcon

Course Curriculum
Lesson Description
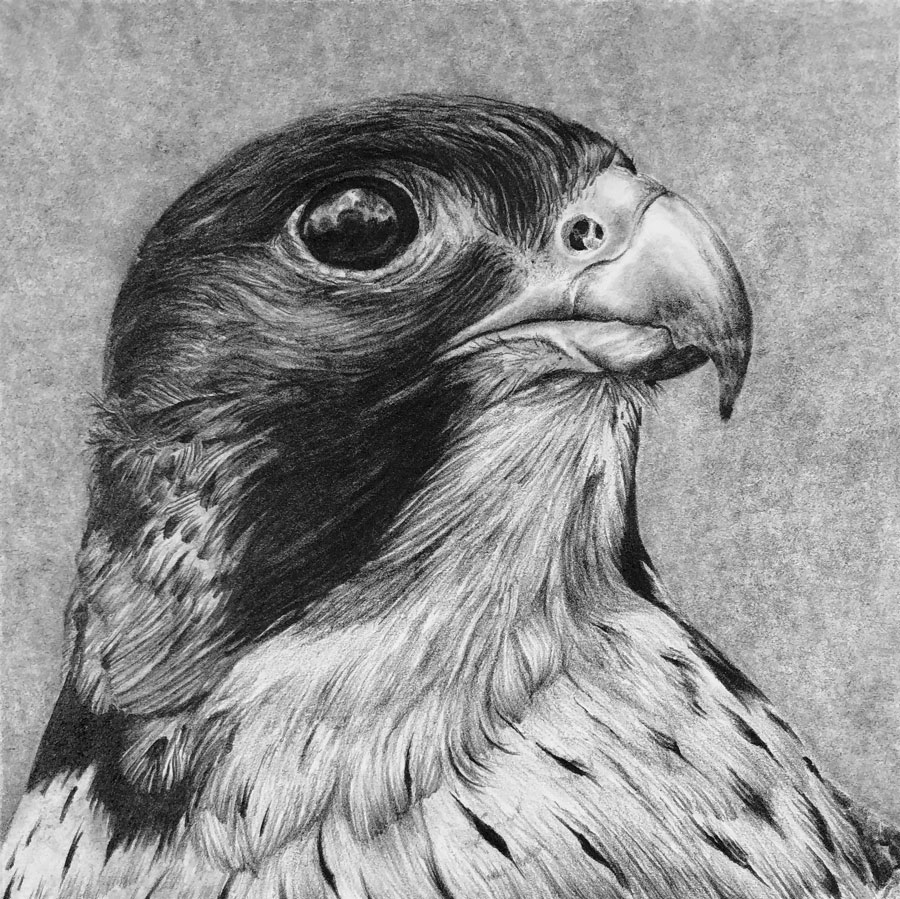
This module introduces artists to the grid drawing method as a powerful tool for improving accuracy and proportion. This lesson focuses on translating a complex subject into a manageable drawing by breaking it down into smaller sections. Using a detailed falcon as the subject, students learn how the grid method supports realistic drawing while building confidence and control.
Understanding the Grid Drawing Method
The class begins by explaining how the grid drawing method works and why it is so effective for realism. You’ll learn how to create a grid on both the reference image and drawing surface, allowing you to focus on one small area at a time. This systematic approach reduces overwhelm and helps eliminate common proportion errors, especially when working with detailed subjects.
Transferring Accurate Proportions
A major emphasis of the lesson is accurately transferring shapes and relationships using the grid. You’ll learn how to carefully observe each square and replicate angles, curves, and placement without guessing. This process trains your eye to see shapes objectively, improving accuracy not just for this drawing, but for future work as well.
Establishing the Falcon Drawing
As the drawing develops, attention turns to refining the falcon’s form. You’ll learn how to connect individual grid sections into a cohesive, believable image. The lesson demonstrates how to maintain clean lines and correct proportions while gradually building the drawing, ensuring that the falcon’s structure and posture feel natural and realistic.
Introducing Value and Detail
Once the outline is established, the module introduces value development and early shading. You’ll learn how to begin suggesting form through light and shadow while preserving clarity. Emphasis is placed on staying organized and patient, using the grid as a guide while gradually transitioning toward a more natural-looking drawing.
Building Observation and Confidence
Beyond the technical process, this module strengthens observation skills and builds confidence. By focusing on small sections, you’ll learn to see shapes and values more accurately, reducing the fear often associated with complex subjects. The grid method becomes a learning tool rather than a crutch, helping you grow as an artist.
A Key Step in Realistic Drawing Development
By the end of the Realistic Pencil Drawing: Grid Drawing a Falcon module, you’ll have a carefully constructed drawing and a clear understanding of how the grid method supports realism. This lesson provides an essential bridge between foundational skills and more advanced drawing techniques, making it an invaluable part of any realistic pencil drawing course.
Specific Lessons
Lesson 1 - Materials and Grid
In this lesson, we take a quick look at the materials. We explore the grid technique and how to ensure accuracy in a drawing using this technique.
Lesson 2 - Head and Eye
In this lesson, we begin developing the texture and values of the head and eye of the falcon.
Lesson 3 - Body Feathers
In this lesson, we continue working on developing textures, working down the back of the falcon.
Lesson 4 - The Beak
In this lesson, we develop the textures and values of the beak of the bird.
Lesson 5 - Finishing the Falcon
In this lesson, we complete the drawing by addressing the remaining feathers and the background.
Lesson Materials
- Canson Heritage Hot Press Watercolor Paper (140 lb.)
- Blackwing Graphite Pencils (Pearl, 602, Matte)
- Blending Stumps
- Vinyl or Plastic Eraser
Lesson Resources
References
Download eBook
Photo Reference
Gridded Photo Reference
Finished Drawing

Founder of The Virtual Instructor, artist and teacher. Matt makes learning art easy to understand and enjoyable.
Hello Matt! Another excellent lesson! For these type of realistic drawings the ‘key’ is obviously…SLOW DOWN & TAKE YOUR TIME! I’m really seeing that this makes a HUGE difference in the final drawing!
Thank you!
p.s.: Incidentally how long did it take you to complete this drawing of the Falcon?
I find it interesting to see how experienced work through things and the time it takes to achieve the successes they do!
Hi Patrick,
I think this one took around 5 hours.
Hi Matt,
I love this series. For all these lessons I would find it really useful if you could note somewhere (maybe in the description tab?) how long each section took you. Like many beginners, I find it hard not to rush but if I know how long it should take at a minimum to complete the section covered in each separate video I find it easier to make myself slow down. I can set aside the hour or whatever it should take and pace myself better. I find your live lessons series absolutely excellent for learning to slow down because they are real time and I can mimic your pace.
Hi Isabel,
This drawing took me around 5-6 hours. Keep in mind that we all work at different paces. Some folks may finish a drawing like this in a much shorter amount of time, while some may take twice the amount of time.
Hallo Matt, wish I could be as patient as you are.. Thanks for this course. Couldn‘t find a similar one in Germany.
Matt, can you please clarify about the Blackwing pencils? Amazon has a set of Palomino Pearl, 602 and Original. Is Original the same as Matte, or would I need to get the Matte separately?
Hi Susan,
Of the Blackwing pencils, I think the only one that is really special is the 602 pencil. The others are too similar to standard drawing pencils. I’m not sure what the difference between “original” and Matte is.
The Blackwing pencil set that I got from Amazon was perfect, because they matched what you were using in the lesson. I have to say Wow! What a great lesson, and series of lessons! I went to art school in the 70’s and never learned what you are teaching. This is like boot camp for pencil drawing. The falcon was really intense, but fun, and turned out reasonably well. Thank you!
Can let me know the equivalent pencil grades instead of black wing I.e. hi 2b etc thanks
Hi Malcolm,
The white Blackwing pencil is similar to a 2B, while the other two pencils are similar to a 4B.
Thank you so much for taking your time to properly inform us. C:
Hi Matt, Is this a Peregrine Falcon?
hi matt, will all drawing with people & animals work with grids?
Hi matt
first i would like to thank you for this amazing course i am learning quite a lot i have 1 question im left handed and sometimes i find it difficult to do drawings that are on the right side is there anything i can do to fix that or could i be doing anything wrong ?
Hi Sana,
It does not matter which hand you work with. The essence of drawing is observation. The order in which you apply the material only matters when you are protecting parts of the drawing from smearing. Since you are left handed, you may choose to start in the upper right hand corner and work down and to the left. Whereas a right handed person may start in the upper left hand corner and work downward and to the right.
Hi,
I just discovered your courses via your youtube channel and so far I love it! I’ve been trying to improve my shading and looking for videos and this is the best I’ve found so far!
I use the grid method a lot when working with a photo and I have a tip for getting a light line that is easy to erase, I discovered that when you use a mechanical pencil for your grid it’s so much easier to get that really light line and it’s so much easier to completely erase without residual lines showing that just won’t come off the paper. It’s been a game changer for me.
Thanks again for the wonderful lessons and I’m looking forward to watching the others especially the colored pencils.
Hi Matt,
Does the Canson Heritage paper produce a smoother gradient than other types of smooth tooth paper, i.e. Bristol Velum?
Thanks,
Len
Hi Leonard,
The Heritage paper is soft (since it is 100% cotton) with a light tooth. Bristol paper is a much harder paper. It will behave in a similar way compared to the Heritage paper but blending is more difficult. I hope this helps.
Yes. Thank you
Len