
Still Life with Gouache

Lessons
About This Lesson Series...
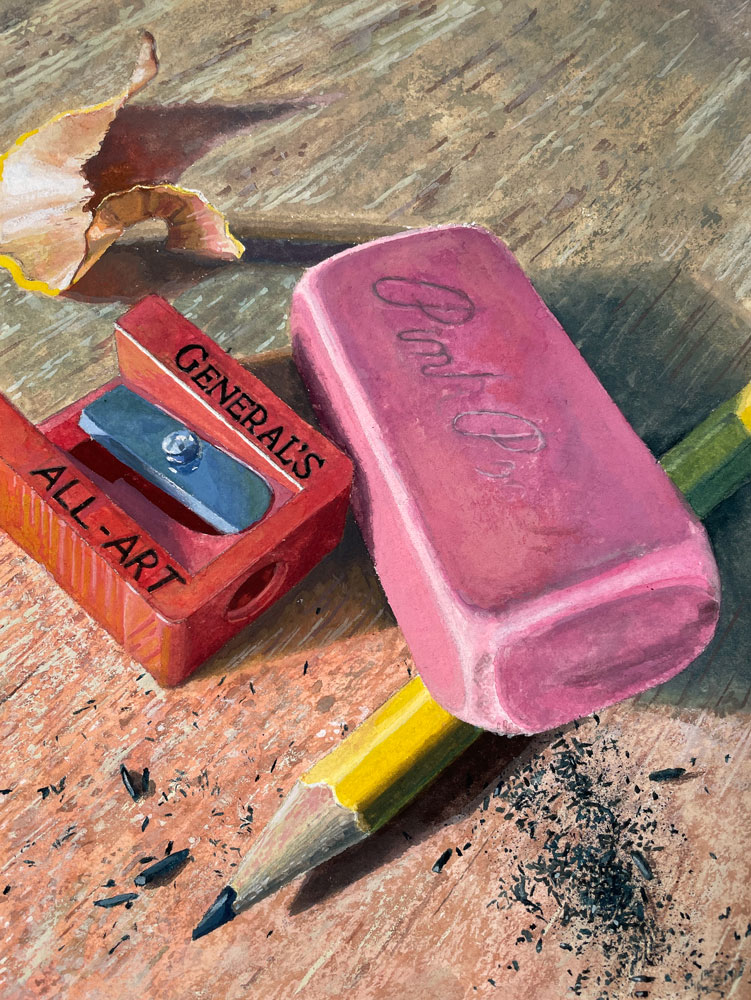
The Still Life with Gouache class is a comprehensive lesson series designed to teach artists how to create a vibrant and realistic still life painting using gouache. This class emphasizes observation, color mixing, layering, and brush techniques to capture form, texture, and light. Gouache, with its opacity and versatility, allows for both bold color application and subtle detail work, making it an ideal medium for still life subjects. By the end of the lesson, you’ll have the skills to confidently depict a variety of objects with depth, realism, and artistic expression.
Planning the Composition
The lesson begins with planning the composition and arranging the still life. You’ll learn how to simplify complex arrangements into basic shapes, establishing a clear structure before painting. Attention is given to proportion, perspective, and balance to ensure that the composition is harmonious and visually appealing. This foundation is essential for creating a cohesive painting where every element contributes to the overall impact.
Understanding Light and Shadow
A key focus of the class is observing and rendering light and shadow. You’ll learn how to identify the direction of light and translate it into areas of highlight, midtone, and shadow. Understanding value relationships is crucial for creating three-dimensional forms and depth in your still life. The instructor demonstrates how to control contrasts and transitions, ensuring that objects appear solid and realistic.
Color Mixing and Application
The class provides detailed instruction on color mixing with gouache to achieve accurate, vibrant tones. You’ll explore techniques for layering colors, adjusting opacity, and creating smooth transitions. The lesson emphasizes how to use color to depict surface qualities and atmospheric effects, helping each object in your still life feel tangible and lifelike. Practical tips are shared for achieving consistent color harmony throughout the painting.
Building Texture and Detail
Texture plays a vital role in making objects believable. You’ll learn techniques for rendering a variety of surfaces, from smooth ceramics to reflective metals and soft fabrics. The instructor demonstrates how to use brushstrokes, layering, and controlled highlights to suggest texture without overwhelming the painting. These methods give your still life depth, realism, and visual interest.
Refining the Composition
As the painting develops, attention shifts to refining details, adjusting edges, and unifying the composition. The class shows how to make subtle corrections to proportions, values, and color relationships, ensuring that the final piece is balanced and cohesive. Emphasis is placed on maintaining freshness and clarity while enhancing the overall impact of the artwork.
A Complete Gouache Experience
By the end of the Still Life with Gouache class, you’ll have a finished, vibrant painting that demonstrates mastery of color, light, texture, and composition. The skills learned in this lesson can be applied to a wide range of subjects, from everyday objects to more complex arrangements, providing a solid foundation for continued exploration in gouache. This class is ideal for artists seeking to improve their technical skills and artistic confidence while creating compelling still life artwork.
Specific Lessons
Lesson 1 (1:08:38)
In lesson one, we discuss the materials and composition and draw the contours of the subjects with graphite using the grid technique.
Lesson 2 (58:45)
In lesson two, we begin with applications of gouache starting with the pencil in the arrangement.
Lesson 3 (1:02:53)
In lesson three, we begin painting the pencil sharpener and address the lettering.
Lesson 4 (1:10:42)
In lesson four, we complete the pencil sharpener begin painting the eraser.
Lesson 5 (1:09:05)
In lesson five, we complete the eraser and begin work on the background.
Lesson 6 (1:04:55)
In lesson six, we use a dry brush technique to create the background texture.
Lesson 7 (1:02:08)
In lesson seven, we complete the painting by adding the finishing touches.
Resources for this Lesson...
Distributing any content downloaded from this site is strictly prohibited and against the terms and conditions of use.
References
Here's what you'll need...
- Graphite Pencil
- Cold Press Watercolor Paper
- Gouache Paints (Winsor and Newton)
- Gouache Paints (Daler-Rowney)
- Nylon Brushes
- Water
(Disclosure: Links to art materials are affiliate links which means we make a small commission if you purchase at no additional cost to you.)

Expert teacher and visual artist. Ashley is encouraging and makes creating art easy to understand.
QUESTION.
WHY WOULDN’T GUACHE BE A GOOD IDEA TO USE ON A CANVAS NOR FOR PAINTING LARGE SUBJECTS?
gouache dray really fast and the canvas will absorb all the water.
I didn’t think that this would come out so great. I’m awe struck. Thanks a bunch!
It would be amazing of these models could be chromecasted.
“Videos”.. not ‘models’… thanks spellcheck 😅.
Today was my first attempt at the grid method I will use it more often thank you so much for the lesson, now to learn gouche