
Subjects with Pen and Ink: Objects

Course Curriculum
Lesson Description
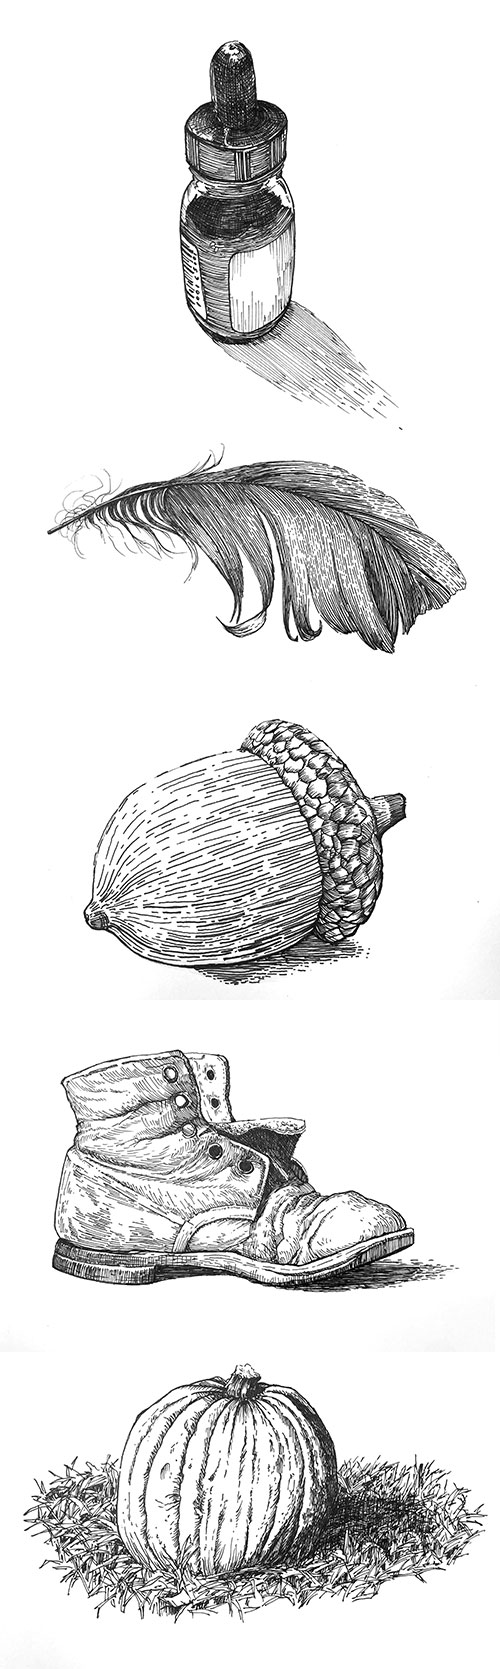
This lesson series is part of the comprehensive “Subjects with Pen and Ink” course, where students learn to draw a variety of everyday subjects using traditional pen and ink techniques. In this series, the focus is on five still life objects—an ink bottle, a feather, an acorn, a boot, and a pumpkin—each chosen to help develop control, precision, and confidence with line work and value creation.
Exploring Materials and Techniques
The series begins with an introduction to the materials and surfaces used throughout the lessons, including technical drawing pens, nib pens, bottled ink, and smooth Bristol paper. Students also review basic ink application methods such as hatching and cross-hatching, which are essential for creating value and texture in pen and ink drawings. This foundation prepares students to handle each object with informed technique and intention.
Drawing the Ink Bottle
The first lesson focuses on an ink bottle, a subject that combines both reflective surfaces and solid form. Students learn how to observe and replicate contours, highlights, and cast shadows using precise line techniques. Hatching and cross-hatching are used to suggest depth and form, helping the drawing feel dimensional on a flat surface.
Rendering the Feather and Acorn
Next, students draw a feather and an acorn, each offering unique textural challenges. The feather teaches graceful, varied line work and delicate transitions, while the acorn offers practice with rounded forms and tighter hatching to define subtle value changes. These lessons build confidence in varying line quality to suggest texture and form.
Capturing the Boot and Pumpkin
The series continues with a boot and a pumpkin, subjects that allow students to practice both structural drawing and more expressive line techniques. The boot encourages observation of wear, creases, and form, while the pumpkin emphasizes broader surfaces and contour lines. Cross-hatching is used to create deeper shadows, stronger contrasts, and a convincing sense of solidity.
Developing Pen and Ink Confidence
By the end of the “Objects” lesson series, students have completed a set of still life drawings and gained a deeper understanding of how to use pen and ink to depict a range of forms and textures. The techniques learned—along with careful observation and line control—lay the groundwork for more advanced subjects later in the full course.
Introduction and Materials
Let's have a look at the materials and surfaces we'll use throughout the course and review the basic ink application techniques we'll apply to complete all 31 drawings.
Lesson 1 - Ink Bottle
In lesson one, we use technical drawing pens and cross hatching to create a drawing of an ink bottle on smooth Bristol paper.
Lesson 2 - Feather
In lesson two, we use technical drawing pens and hatching to create a drawing of a feather.
Lesson 3 - Acorn
In lesson three, we use technical drawing pens and hatching to create a drawing of an acorn.
Lesson 4 - Shoe
In lesson four, we use technical drawing pens and cross hatching to create a drawing of an old shoe.
Lesson 5 - Pumpkin
In lesson five, we use technical drawing pens and cross hatching to create a drawing of a pumpkin.
Lesson Materials
- Technical Drawing Pens
- Dip or Nib Pens
- Bottled Ink (Carbon Black)
- Smooth Bristol Paper
- 2H, H, or HB Graphite Pencil
- Kneaded Eraser
Lesson Resources
References
Download eBook
Reference Images
Finished Drawing

Founder of The Virtual Instructor, artist and teacher. Matt makes learning art easy to understand and enjoyable.
I’m going to be following everyday!! Looking so forward to this.
Liked the lesson good fun
I’m going to be following everyday!!
Looking forward to Lesson 2. So glad this course has come up.
Damn! I’m stuck in hospital having had a knee replacement and it will be another three days before I am allowed home….. grrr. I shall have to work hard to catch up. The drawing, and commentary, on the ink bottle were superb – as usual.
Thank you Matt.
Best regards from sunny Portugal
Great timing and great class. Thank you, Matt!
This course is exactly what I’ve been looking for! Thank you so much! Sunny greetings from Tunisia in North Africa!
Matt, inktober is wonderful! I love your pen and ink lessons. Suggestion: I would like to see the hatching used on the portrait of a young person. Keep up the good job!
Matt, can you explain whether we are supposed to try to follow the contours/ actual strands of the feather of to be concerned purely with creating darks and lights – I am a bit confused!
HI Barbara, the cross contour lines are doing double duty with the feather. Not only are they creating the texture, but also the value. In the areas were the value is lighter, a broken line is used or less lines are used and the texture is implied.
I am so excited to begin this course!! Thanks Matt!!
Appreciate you so much. Hoping I will eventually be able to ‘see’ the way you do. You’re awesome.
I am soo looking forward to following all the lessons. Actually I am teaching students to improve their coloured pencil skills. While I feel confident in applying coloured pencils I had a second thought about improving my own drawing skills. And here it was. You came up with the right lessons to do: Easy to take with me everywhere, bus and train, and anytime. Maybe not the ink washes in the busses, ha, ha! Thank you.
Will this course be offered as a standalone course when the month is over and all lessons have been released?
Hi Amy,
Yes, it will. I don’t know the exact date it will be available as a stand alone course though.
I’m so excited about this new series of pen and ink. Thank youI
I hope you do tons and tons of them,
Matt,
This may be a 62 or 93 day project for me. I am stuck on the Acorn right now.
I also noticed my ability to draw a straight line or make the pen go where my mind says to go is getting worse. I am hanging in there though and I will just repeat the
acorn until I get it looking as good as I want and then move on.
Ken
Oooooohhhhh this looks great !!! I went away a while but back and this can add on to the pen & ink one I’m half way through.
Yes, nice one Matt all the best 😁
I am in the trial period but will pay in full shortly. I am a bit anxious as I am often I’ll and unable to draw on those days, I hope I can still complete the course eventually
Valerie.
I am in the trial period but will pay in full shortly. I am a bit anxious as I am often ill and unable to draw on those days, I hope I can still complete the course eventually
Valerie.
hi matt !!
how can I send you my work so that you can suggest any improvement?
Hi Kritam! You could submit your work for a critique here on the virtualinstructor.
hi matt with the grey broken lines is there any right and wrong way like is there any wrong amount of broken lines, is there any right way to do this?
I am hoping this course will get me out of my Coronovirus artists block ! Today I shall practice the techniques. I am keeping my fingers crossed. Normally your courses never fail to inspire me Matt.
Not being able to download the video for offline viewing is a bummer. I go to a cancer ward for 5 hrs every 3 weeks. The hospital Wi-Fi does not support streaming. My option was to put the videos on a flash card and watch them. I also download the eBook for ref.
Hi Matt, as an absolute beginner it is such a pleasure to follow your lessons. I am so happy to have found you in the universe of youtube :o). It seems as if your skills and abilities flow directly into my hand through the youtube channel. It’s so fun building these drawing skills with you. Keep it up.
When drawing the shoe, I noticed that after a while I looked more at your drawing and drawed the lines as you did and how you explained it. But when I looked at the reference, I found it difficult to recognize these different planes. How can I sharpen this view? Just through more practice or do you have another tip? The tip with the finger, i.e. imagining running my finger over the surface doesn’t help me enough, especially with the shoe. I get lost in all these planes.
Hi Martina,
The shoe is a complex object. It may be helpful to take a look at this lesson…https://thevirtualinstructor.com/cross-contour-lines.html. If you are a member, this lesson may also help…https://thevirtualinstructor.com/members/25-days-to-better-drawings-day-six-cross-contour-lines/
Thank you. I’m so enjoying each lesson. It really is almost a meditation time as I lose myself in the lesson and drawing. I’ve come to this later in life and it gives me so much pleasure. With your guidance even I can draw passable and identifiable objects with form and value. So thank you again 😀
why can’t I see the videos??
Hi Melodee,
The videos appear to be playing normally. Are you accessing the site via a proxy? What browser are you using?
Hello everyone!, I have a question I am going to buy these materials for the first time and I do not know which Dip or Nib Pens to buy and what thickness of Technical Drawing Pens, 0.3; 0.1 and the third I don’t see. thanks!
Hi Marta,
The Speedball sketching nib pen set is very inexpensive and great! It has all the nibs you’ll need. You also may consider the Staedtler technical pen set which has 6 pens with widths of .05 mm to .8 mm.
ok, thanks!
I like the options for using both the ebook and the video. I print out the reference photo and instructions and take them, along with a sketchbook, when I go out.
Matt, question: Is that ink acrylic based. I went to the art store to pick it up and all they had was acrylic based. On my screen, it’s too small to read the label. Thanks, Bee
Hi Bearstarfire,
Yes, you are correct. It is acrylic based ink. I hope this helps.
Thank you Matt. I’ll be drawing this feather. Having said that I have just finished my bottle. I’m thinking of adding graphitint on top.
What do you think?
Hi Diana,
You can certainly do this, but I would do a small test first to make sure you are happy with the results.
Hi Matt,
I did it, I drew an acorn with pen and graphitint. It looks so pretty :).
Hope soon be part of your membership and share my drawings.
Thanks so much. This course is amazing
Thank you for the commentary as you were drawing the ink bottle. A great explanation of the concepts that could easily be overlooked.
Hi Matt,
I receive a newsletter from a Dutch drawing teacher and she had a link in her newsletter of drawing a cake from your website. I immediately fell in love with all your lessons and courses and now have a membership and I have learned so much! Thank you very much and keep up the great lessons, good explanations and beautiful videos. Greetings from the Netherlands.